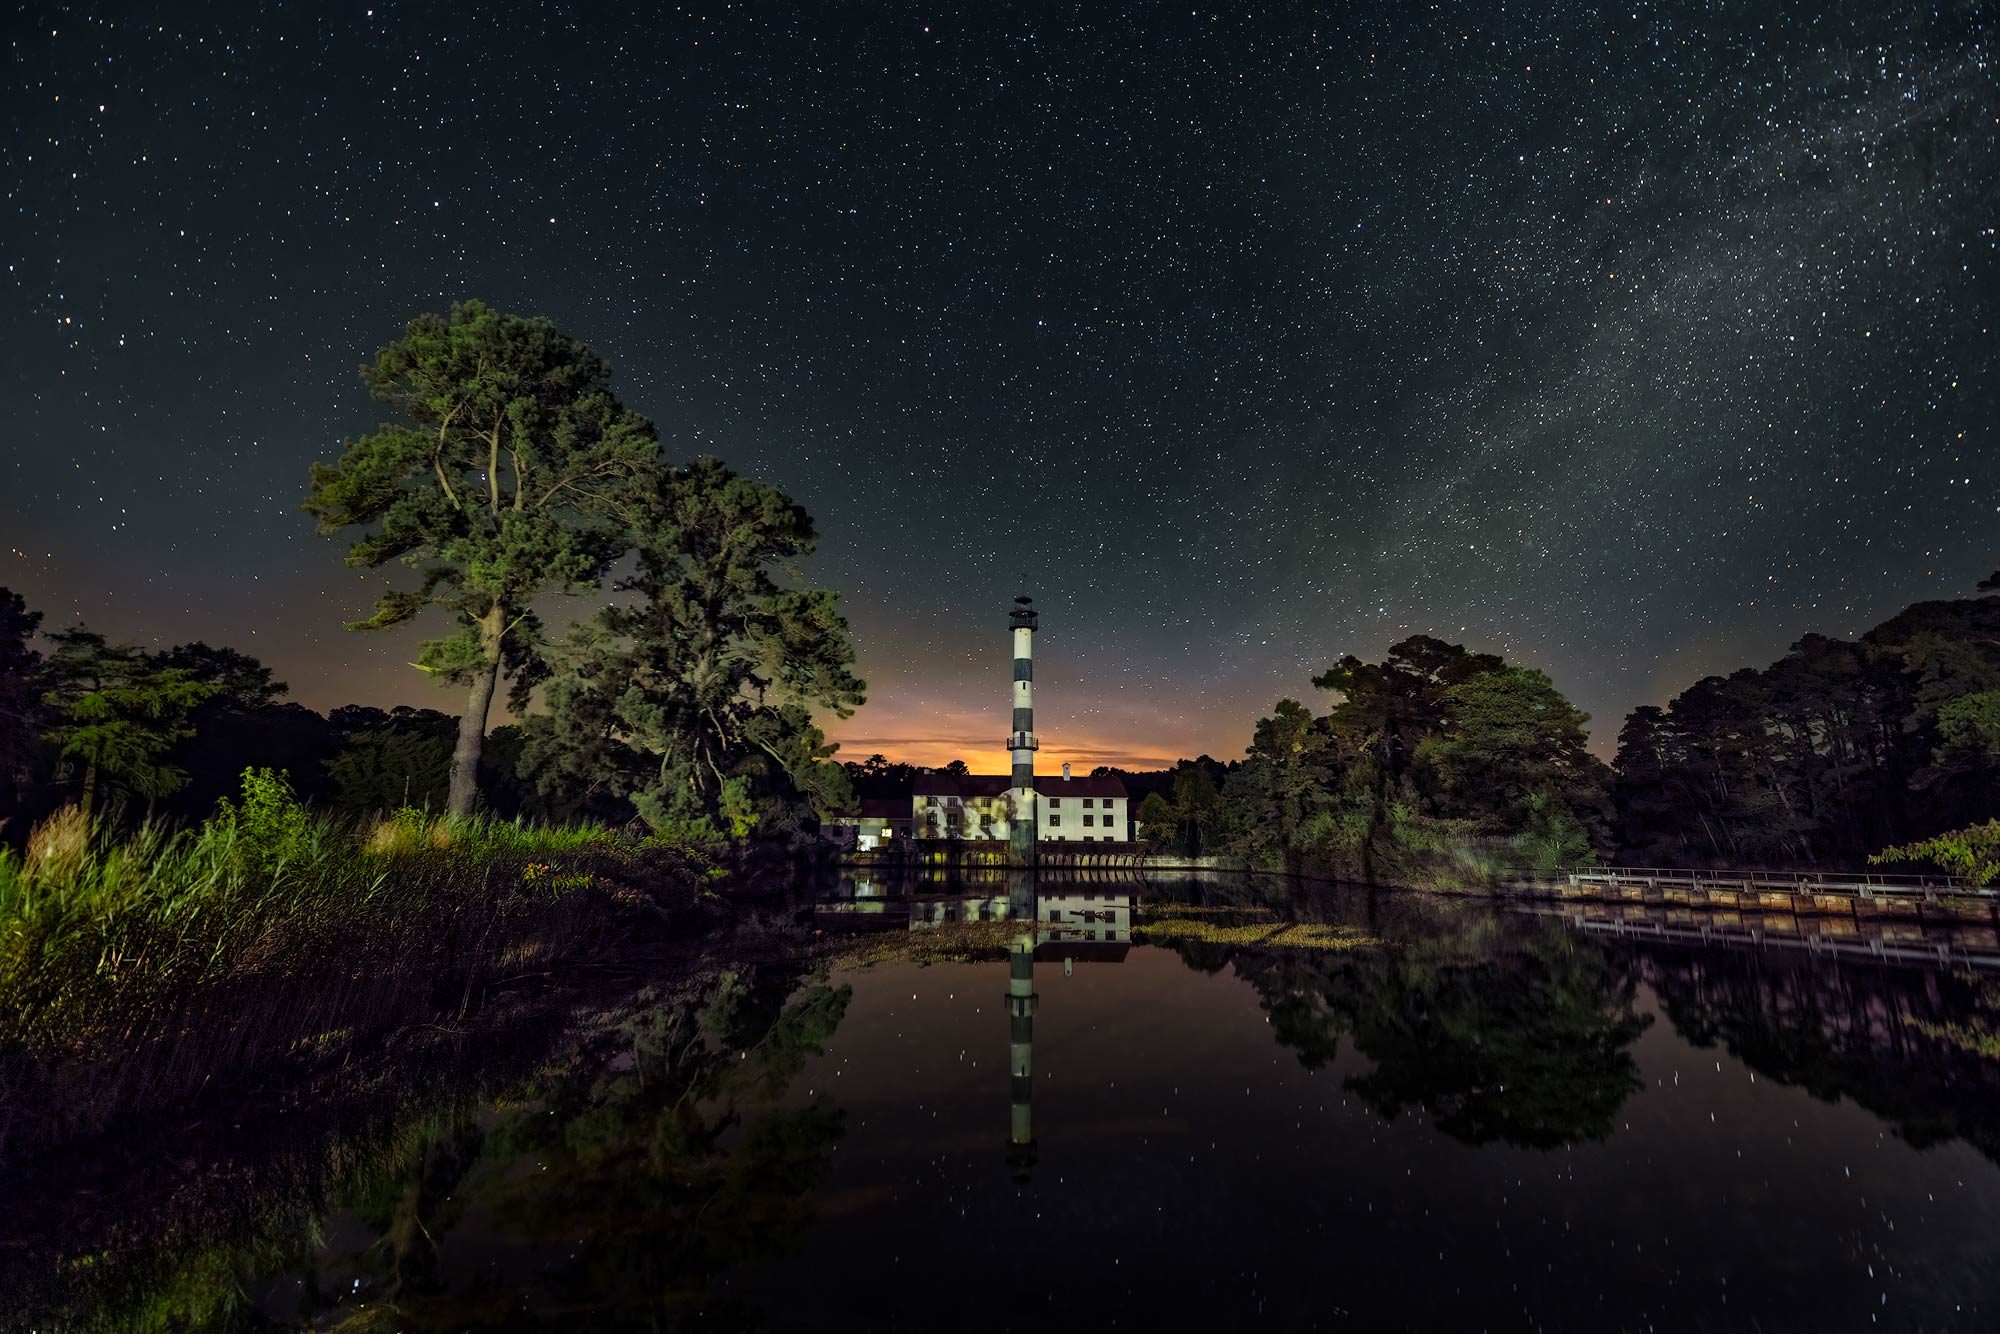
I finally got a new computer with enough processing power to create time-lapse videos so I went back to Lake Mattamuskeet to photograph Polaris, the North Star, above historic Mattamuskeet Lodge. The plan was to make a time-lapse video of the stars rotating around Polaris, with reflections of the stars in the canal in front of the lodge. I also wanted the video to serve as an illustration of how star trail images are created.
Mattamuskeet Lodge was originally a pumping station built in 1916 to drain Lake Mattamuskeet and convert it to farmland. The effort ultimately failed and the pump station was converted into a hunting lodge in 1937. The lodge remained open until 1974, but has been abandoned since that time. Currently efforts are being made to restore the lodge, but obtaining the necessary funding remains a problem.
I took 420 images over a 4 hour period and condensed them into a sixteen second video clip. The images were processed in Adobe Camera Raw, Lightroom, and a time-lapse plug-in called LRTimelapse. The time-lapse video was then combined with still images, titles and music in the video-editing program Cyberlink PowerDirector. However, I was disappointed in the color-editing capability of PowerDirector, so I switched to another program, Davinci Resolve, for editing the actual video that is shown.
When I started, I knew how to shoot the images to create a time-lapse, but knew very little about how to edit and render the images into a time-lapse video. Once the time-lapse sequence was created with LRTimelapse, I then realized that I had to find and use a video-editing program to be able to add titles, still images and music. There are simpler options than my choices for creating movies from the time-lapse sequences, but they weren’t able to do all that I wanted. Alan Dyer’s ebooks, mentioned below, cover many of the software options for processing time-lapse sequences and movies.
The images were taken on June 29th. It took a lot of web research over the next two months to find and learn how to use the best programs for actually creating the final product. Over-all I am pleased with the video. It was indeed a lot of work for a 67 second video, but I learned some skills that will help me in future projects.
The original still images used are 8K in resolution, since the Nikon D850 produces images that are 8256 X 5504 pixels. The rendered video was 4K, but I have the capability to render in 8K in the future. Originally I uploaded the video to YouTube, but I was disappointed in the quality of the video when viewed on my desktop or mobile devices. So I uploaded a version to Vimeo which seemed to look better on playback
There are plenty of online tutorials on how to shoot and process time-lapse videos, but if you are serious about the subject I would recommend purchasing the two ebooks by Alan Dyer: “How to Photograph Nightscapes and Timelapses” and “How to Process Nightscapes and Timelapses”. These two books are the most comprehensive resources I’ve found on the subject.
Most serious time-lapse photographers use LRTimelapse to render a time-lapse video from still images. There is a free version of the program that you can try out as well as two levels of paid versions. I purchased the Professional version because I wanted to create the highest resolution files possible. LRTimelapse developer Gunther Wegner has also written an ebook entitled “Timelapse: Shooting and Processing” that I highly recommend.
LRTimelapse will render a video of the timelapse sequence at the desired frame rate (I used 24 frames per second).
To add titles and music to your timelapse, you then need a video editing program. I purchased and planned to use Cyberlink PowerDirector (for $99) because it was supposedly a reasonably full-featured program, but not nearly as expensive as the high end programs. I was a little disappointed in the resulting video, because I found the color and dynamic range of the video clips to be too dissimilar from the still images used in the video. There was no way to correct for this problem in PowerDirector, so I had to find another program to use to edit the movie.
The answer to my problem turned out to be a surprisingly full-featured video editing program that was free–Davinci Resolve. At first glance the program seems overwhelming–the user manual is 2700 pages long. But it was able to give me the final result that I wanted. Moreover, the purchase of Cyberlink PowerDirector was not a complete loss. I did use it to create the titles and end credits used the final video. Creating anything other than simple titles in DaVinci Resolve was very complicated and time consuming.
Another program that I found very useful was Steven Christenson’s Advanced Stacker Plus Actions for Photoshop, from StarCircle Academy. Alan Dyer’s ebooks directed me to these actions and they are useful for creating some interesting star trail effects in timelapse videos. To get the best resolution out of these actions, you have to change some settings–and the instructions are not particularly clear. However if you are familiar with working with actions, you should be able to figure out which action steps to toggle on or off.
Link to Vimeo video: https://vimeo.com/368918473
Link to YouTube video: https://www.youtube.com/watch?v=lP2OVQvj0eU