Digital noise in images can be a real problem when photographing in low light conditions. Although each generation of new cameras seems to show an improvement in noise characteristics, photographers continue to push the envelope and get out earlier, stay out later, and shoot in even lower light conditions. Cameras with larger sensors and lower megapixel counts are usually less prone to noise. However down-sampling an image from a high megapixel camera to the same resolution of a lower megapixel camera could largely mitigate the difference.
Improvements in noise reduction software have probably had the most dramatic impact on noise reduction. Programs like Topaz Denoise AI and DxO PureRaw are two examples. Also Adobe has recently made a significant advance in the noise reduction capability of Lightroom and Camera Raw. In this article I will show how I salvaged what I thought was a hopelessly underexposed high ISO image, but first I will describe my typical workflow for noise reduction.
Typical Workflow
I generally use Topaz Denoise AI for noise reduction. I experimented with DxO PureRaw and DxO Photolab because many photographers claimed that DxO’s XD Prime technology offered superior noise reduction. In addition using DxO’s extensive lens testing database would allow superior sharpening of raw images. I ended up seeing little difference between Topaz Denoise and DxO. I stuck with Topaz Denoise AI because switching to DxO would involve a time-consuming transfer to and from DxO. In addition DxO PureRaw did not provide any preview of noise reduction and, although Dxo Photolab did have a noise reduction preview window, it was too small for easily evaluating the effect throughout the image.
My workflow starts with some basic processing of raw images in Lightroom Classic. White Balance, Exposure, Highlights, Whites, Shadows and Blacks are adjusted as necessary. I often add a little Texture and on rare occasions adjust Clarity and Dehaze. I do no sharpening or noise reduction in Lightroom but generally enable both correction of chromatic aberrations and lens profile corrections. I do the rest of my image processing in Photoshop. Generally noise reduction with Topaz Denoise is my first step once in Photoshop.
Although all of my images do not need noise reduction, I usually run them through Topaz Denoise AI because it will also sharpen images. On these images I turn the noise reduction slider all the way to the left and adjust only sharpness. I tend to use the Low Light denoise model on almost all my images that need noise reduction. I seem to get the best results with that model.
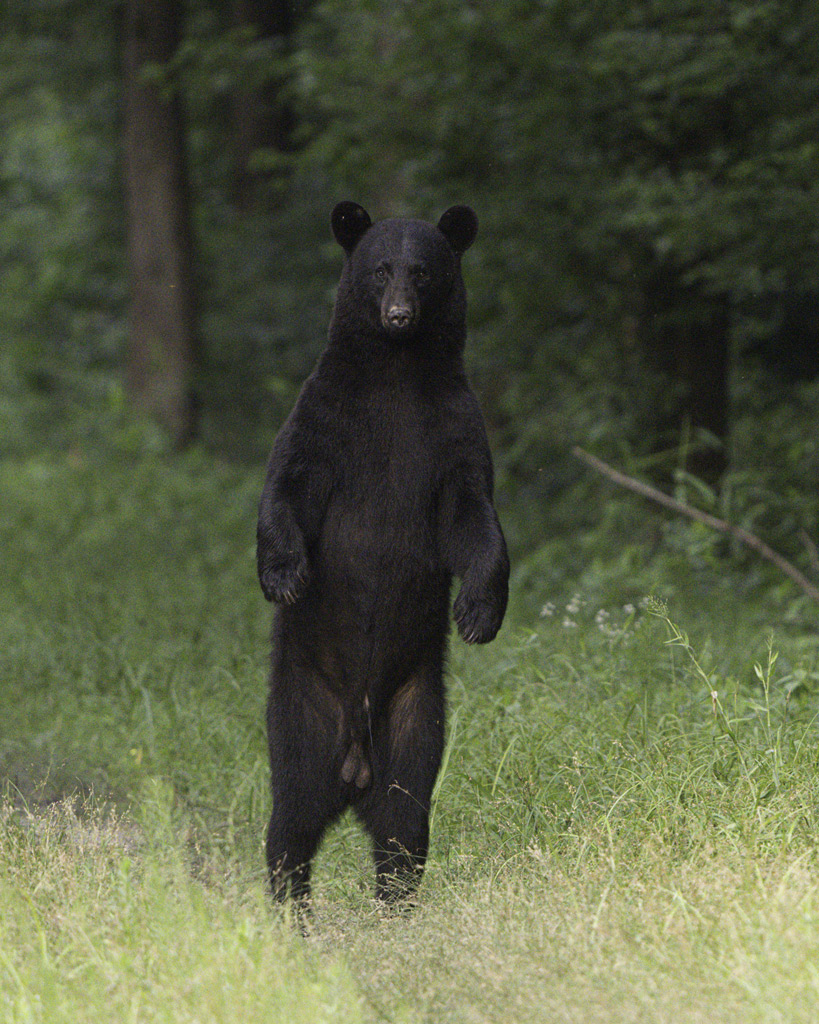
Below is an image of a black bear shot at ISO 12800. Only basic adjustments in Lightroom have been applied. The image was properly exposed–only the shadows (+20) and blacks (+16) were adjusted to improve detail in the bear. The only other Lightroom adjustments were Remove Chromatic Aberrations and Enable Profile Corrections. The image was significantly cropped, from a horizontal to a vertical, from a Sony A1 50 MP image to a 24 MP image. Cropping magnifies the visibility of noise in an image.
In the image below the raw image has been opened in Photoshop and further processed with Topaz Denoise AI only–no other adjustments were made.

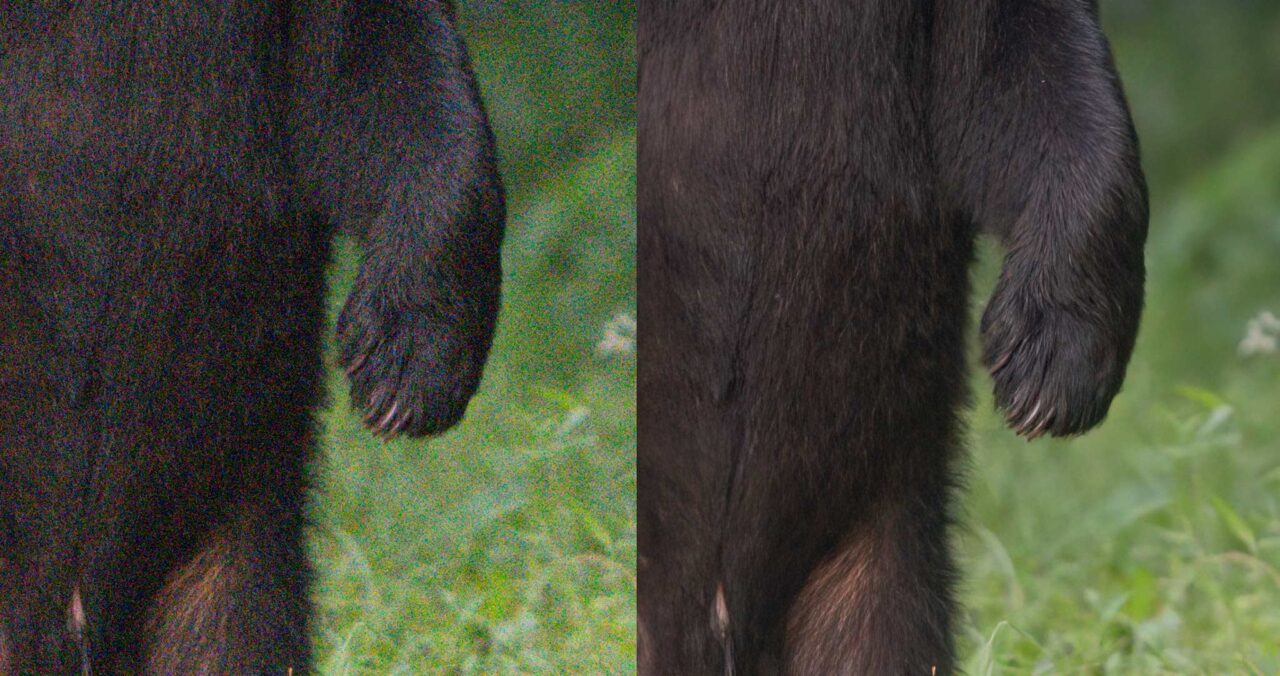
Below are side-by-side comparisons of enlarged portions of the first two images, with denoised image on the right.
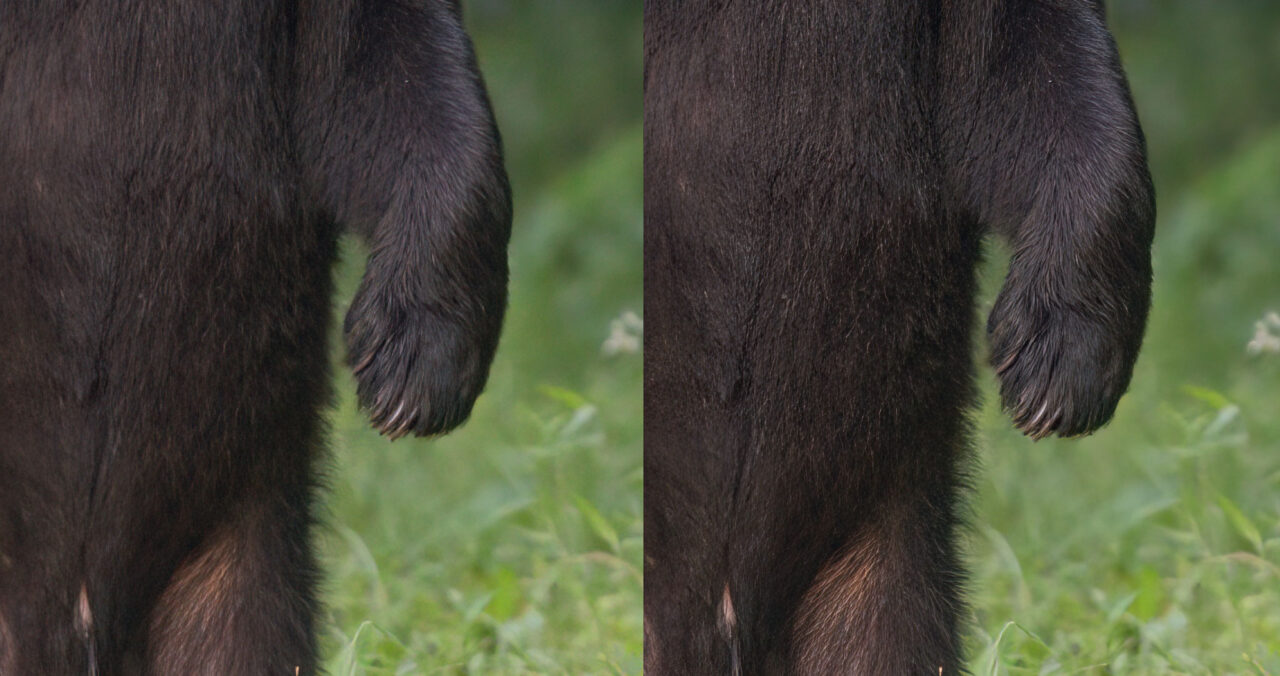
Below is a comparison of the Denoise AI image (on the right above) compared to to the same image after some Topaz Sharpen AI has been applied. I don’t use Topaz Sharpen AI a lot with my images. I find it somewhat unpredictable in use and prone to create sharpening artifacts. I tend to use it for high ISO images like this one–where the Denoise AI has removed the noise but slightly softened the detail. With careful adjustment of sliders, Topaz Sharpen AI can recover the sharpness. I will also try Topaz Sharpen AI on images where I missed the focus. Sometimes it can save an image, but more often it does not. It certainly does not perform as well as advertised by Topaz.
Salvaging the Underexposed High ISO Image
How It Happened
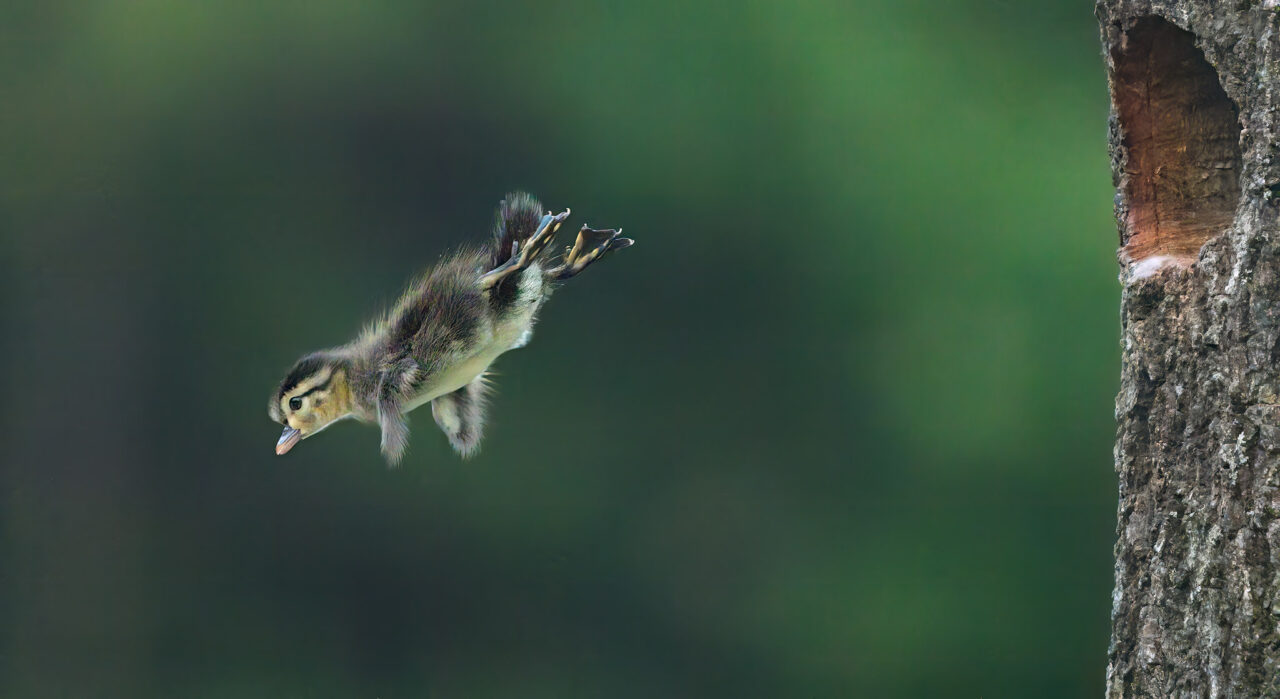
I’ve been photographing the wood ducks on my backyard pond for 12 years. The ducks nest in nest boxes that I’ve modified by adding natural wood fronts. The ducklings hatch after about 30 days of incubation. They leave their nest the day after hatching, a day I call “Jump Day.” You can read about wood duck nesting biology and my experience photographing jump days in this earlier blog post: https://erkesphoto.com/wood-ducks/jump-day/
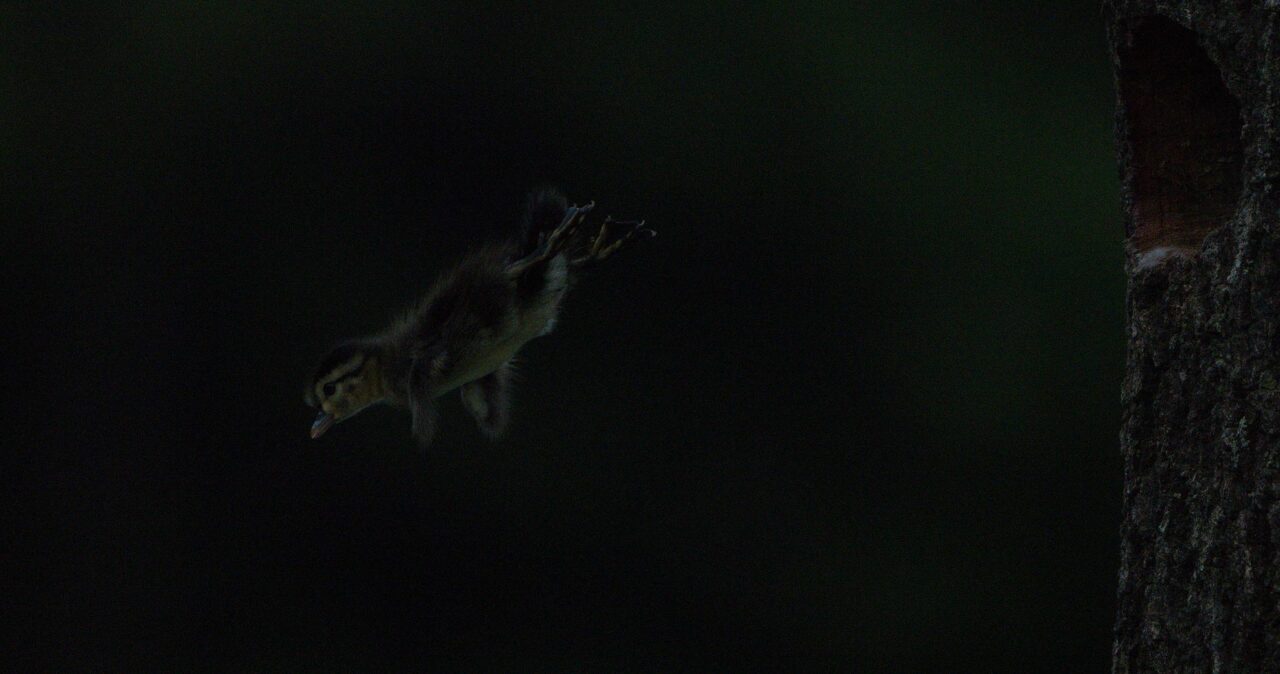
I’ve witnessed and photographed jump day 20 times. On this particular occasion, I was attempting for the first time to make a video of the event. However I also wanted to photograph it so I set up two cameras, planning to start recording on one while switching to the other to photograph stills. I had the still camera set for manual exposure mode with Auto ISO at 1/2500 second shutter speed and maximum aperture. From previous experience, I knew that the ducklings could leap so explosively off the nest entrance that I needed a shutter speed of at least 1/2500 sec. The morning was heavily overcast and the ducklings left earlier than any other day that I’ve photographed them, just shortly after what would have been sunrise. I had the maximum ISO for my Auto ISO range set at 12,800 and the ducklings left so quickly that I was unable to dive into the camera menu and change the max ISO setting. Therefore all my images were taken at 1/2500 sec at ISO 12800. Due to the low light conditions, all images were almost 3 stops underexposed. Even if I had been able to change the ISO to 51,200 or 102,400, I don’t know if it would have made much difference. I’m not sure correcting the exposure in camera would have provided much improvement over correction during post processing. Either way I was going to have to deal with extremely noisy images.
Salvaging the Image
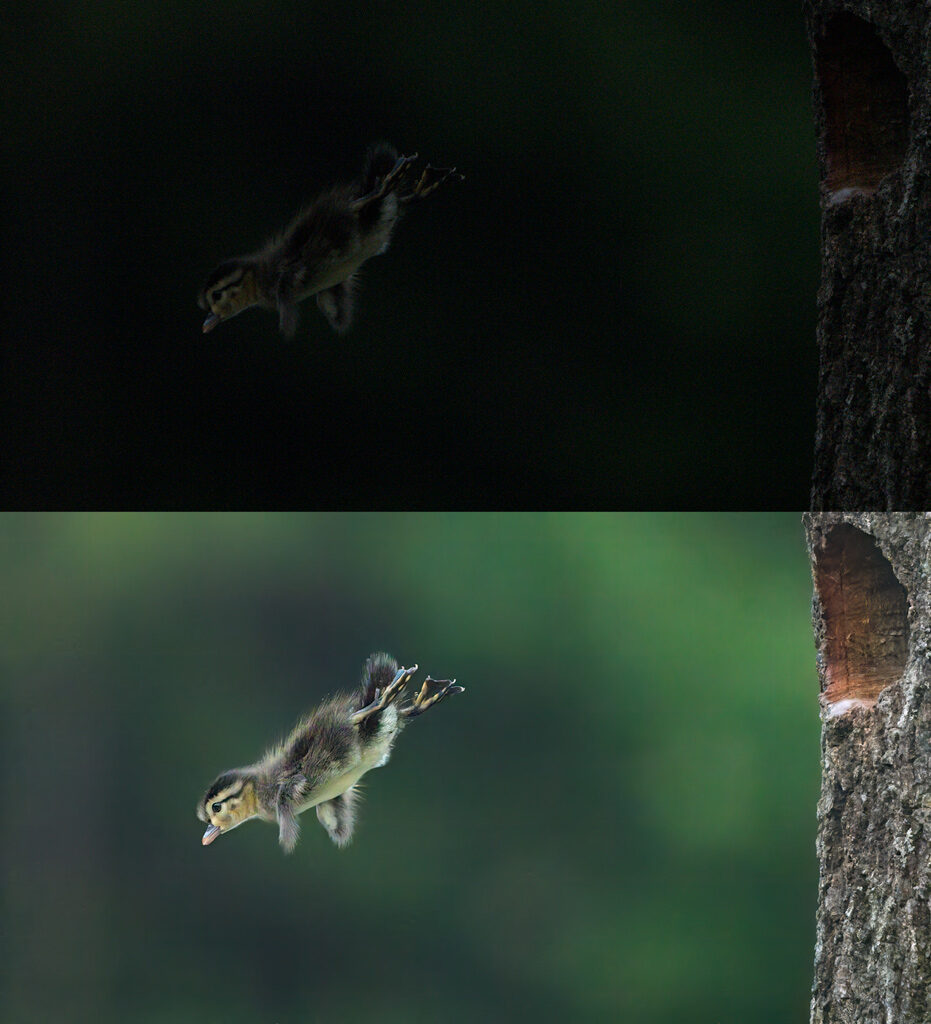
The image below is after brightening the raw image above in Lightroom with a + 2.88 increase in Exposure and a +35 increase in Whites. No other adjustments were made to the raw image. The raw image is a 29 MP crop of the original 50 MP image.
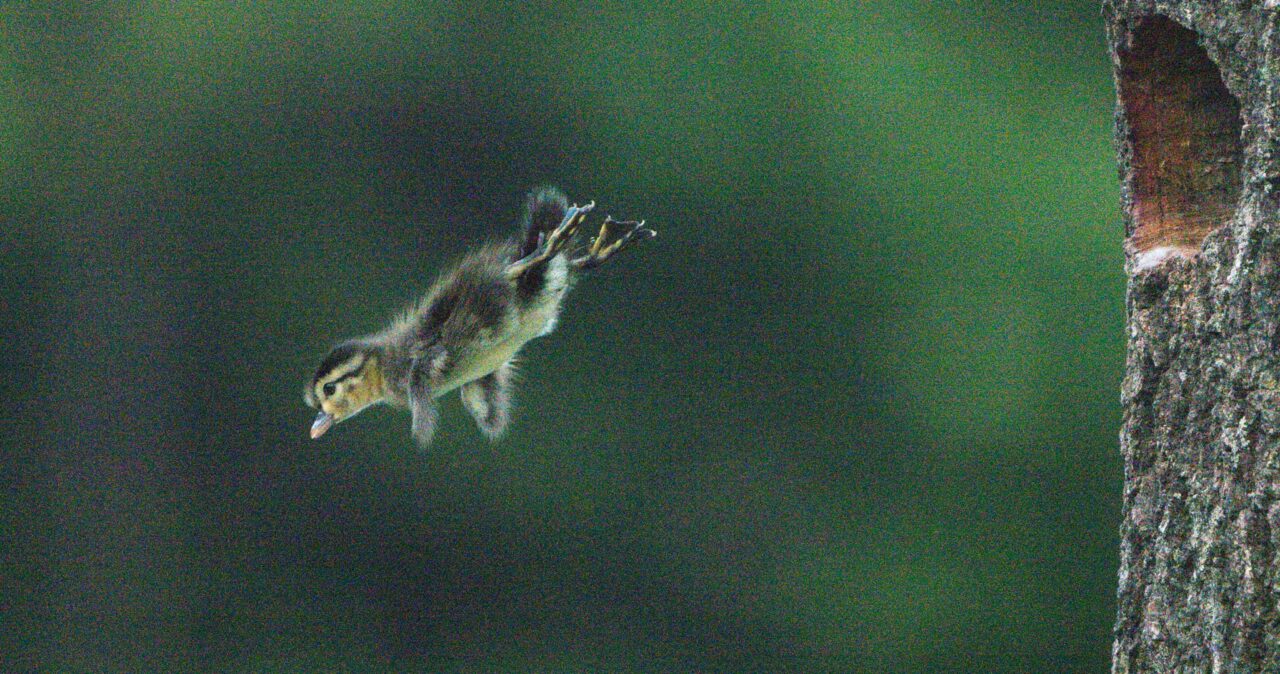
I didn’t think the images would be usable, but decided to make an attempt anyway, because the images contained some of my best jump day compositions obtained thus far.
I tried Topaz Denoise AI first. I was able to remove the noise but the image was so softened that I could not recover the detail with Topaz Sharpen AI. I tried DxO Photolab next with similar results.
Since Topaz Sharpen AI had added Sharpen Models for “Very Noisy’ images, I decided to try Topaz Sharpen AI first, before using Topaz Denoise AI. This was something I had never tried before on an image. I found that Sharpen AI did result in a sharpened image that I thought I could use, but the background was full of artifacts. The Sharpen models that gave the best results were Motion Blur–Very Noisy and, somewhat surprisingly, Motion Blur–Very Blurry, with the latter slightly better than the former. I decided that I would need to process the image one way for a sharp subject and another way for a clean noise-free background. I would then blend the two images together.
The images and description below describe my method.
Below is a copy of the Channels Palette in Photoshop showing the image layers and layer masks I used to process the image. An explanation of the different layers is detailed below.

Layer 1: Below is the raw image opened in Photoshop with just some basic adjustments, in this case, a + 2.88 increase in Exposure and a +35 increase in Whites
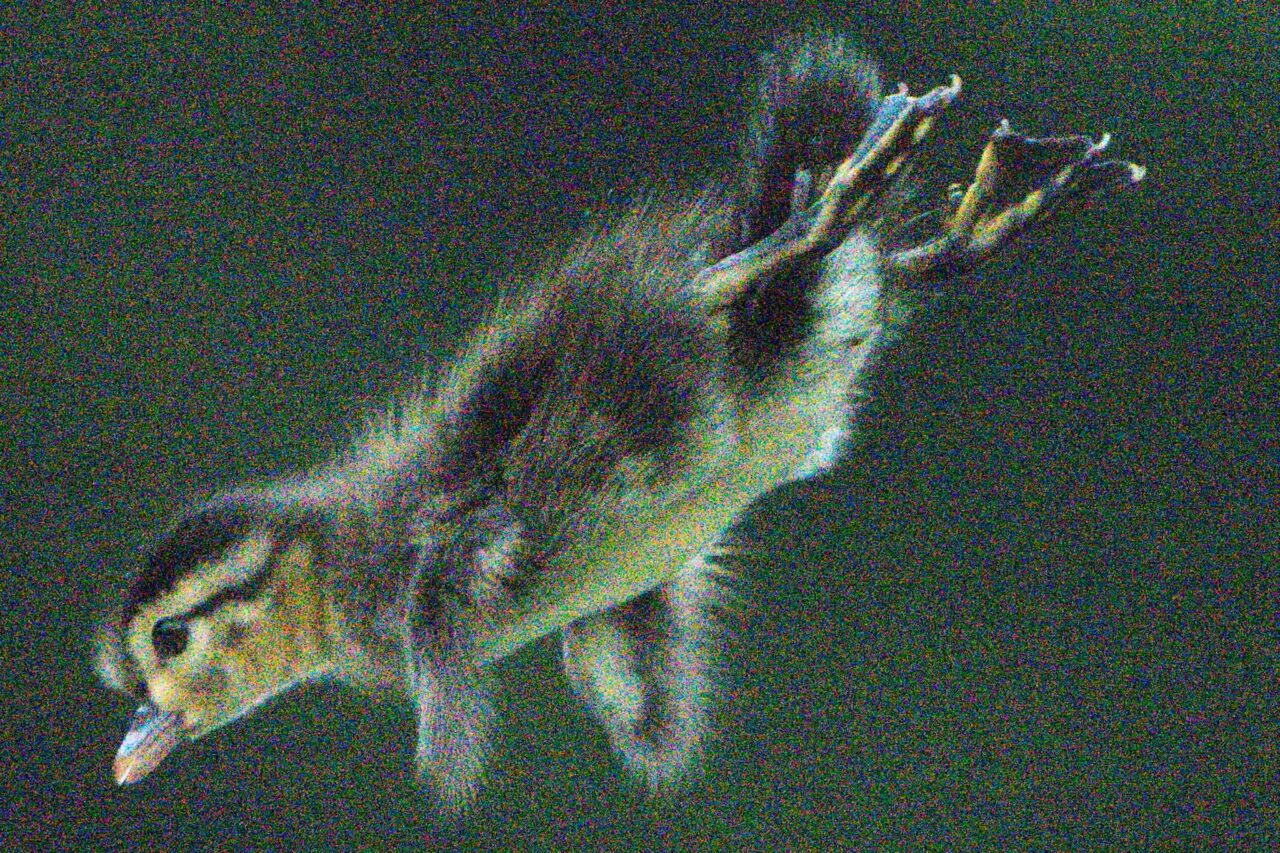
Layer 2: Below is a duplicate of raw image layer run through Topaz Denoise AI–Low Light model with the best settings I could obtain for balancing noise reduction and maintaining sharpness. All background noise was not removed and some Topaz artifacts were introduced in background. Image is too soft, particularly head, feet, belly and far wing.
Layer 3: Below is a copy of Layer 2 run through Topaz Denoise AI Low Light a second time. This further softened the duckling but did satisfactorily denoise the background, removing all artifacts. I decided to use this layer as my background layer. The duckling was masked out with a subject selection layer mask, using a sharper image of duckling obtained by other methods.
Layer 4: Below is a copy of Layer 2 after an attempt to sharpen subject with Sharpen AI. The Motion Blur–Very Blurry model gave the best results. Settings increased background artifacts and also did not sharpen image well enough– creating some sharpening artifacts and also failing to sharpen some areas of subject. The head in particular remained too soft. I did use some parts of the subject on this layer in the final image.
Layer 5: Below is a copy of raw image layer run through Sharpen AI using the Motion Blur–Very Blurry model. Topaz Denoise AI has not been used. I liked the sharpening of the duckling, but the background was full of artifacts. The sharpened subject appeared in some ways over-sharpened and grainy or noisy. I decided to primarily use this layer as my subject and use a layer mask and black brush of varying opacity to paint out portions of the layer and reveal portions of Layer 4 below it. So the subject in the final image consisted of portions of layers 4 and 5.
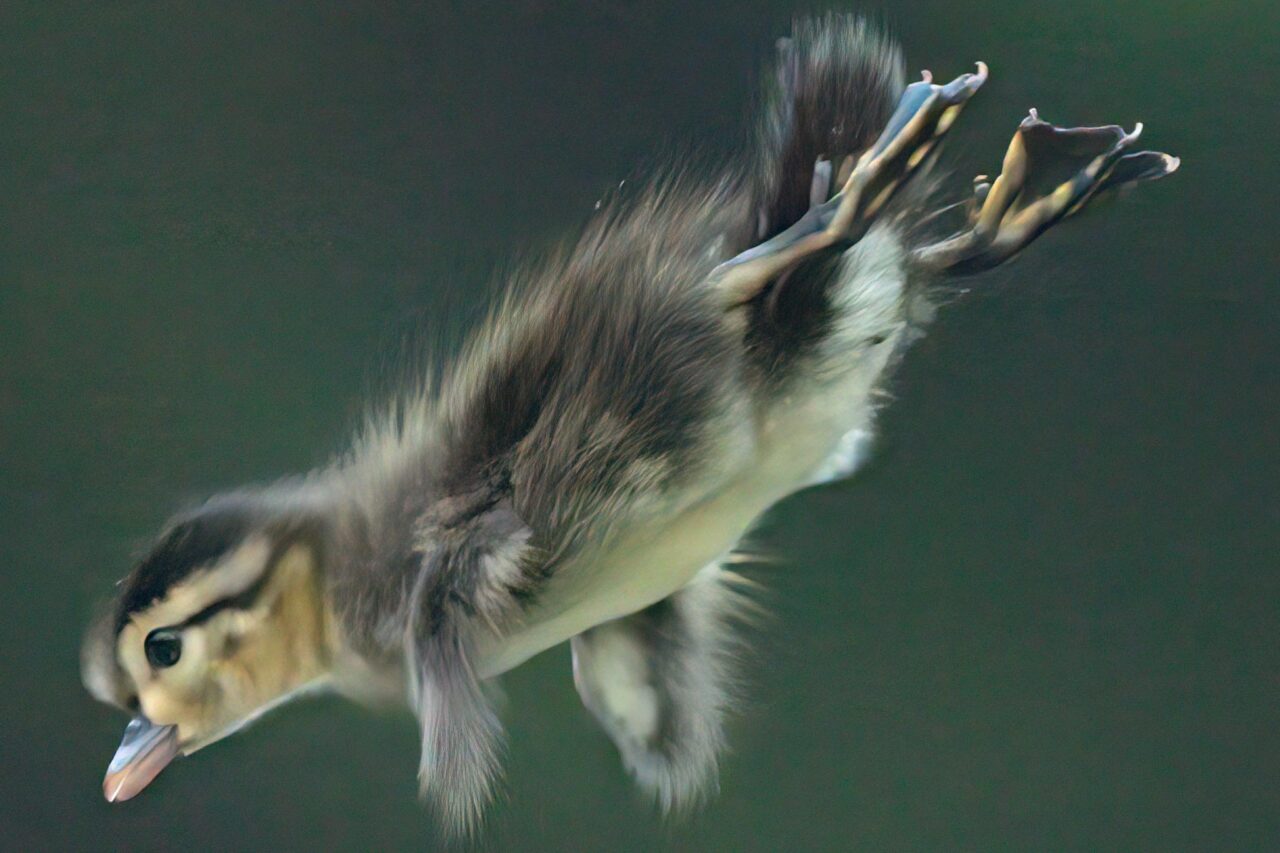
Below is the final base image of subject, before tonal and color edits. The subject is a combination of layers 4 and 5 (mostly layer 5). The background is from Layer 3. The subject and background were carefully blended together with layer masks to ensure a smooth artifact-free transition from subject to background. Layer 1 could have been deleted but was kept to help illustrate workflow.

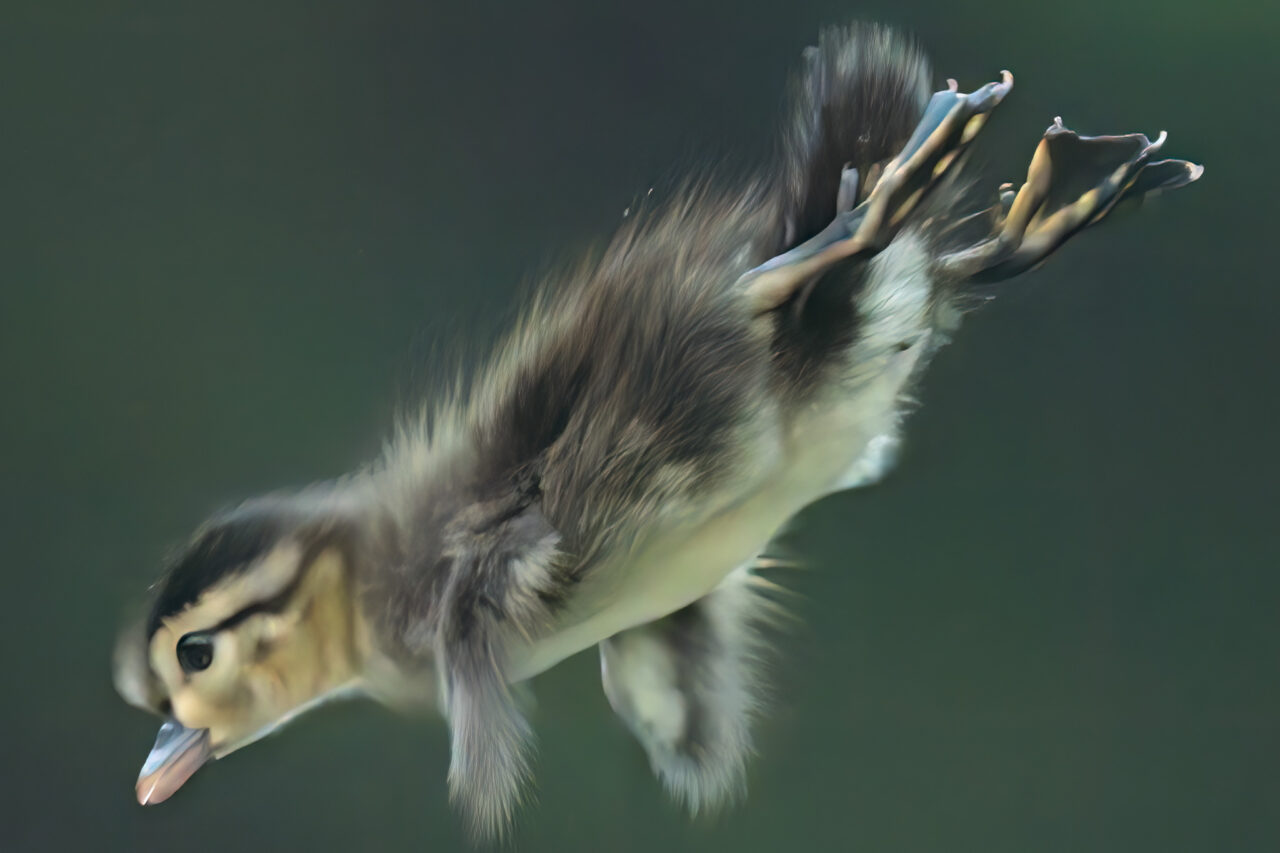
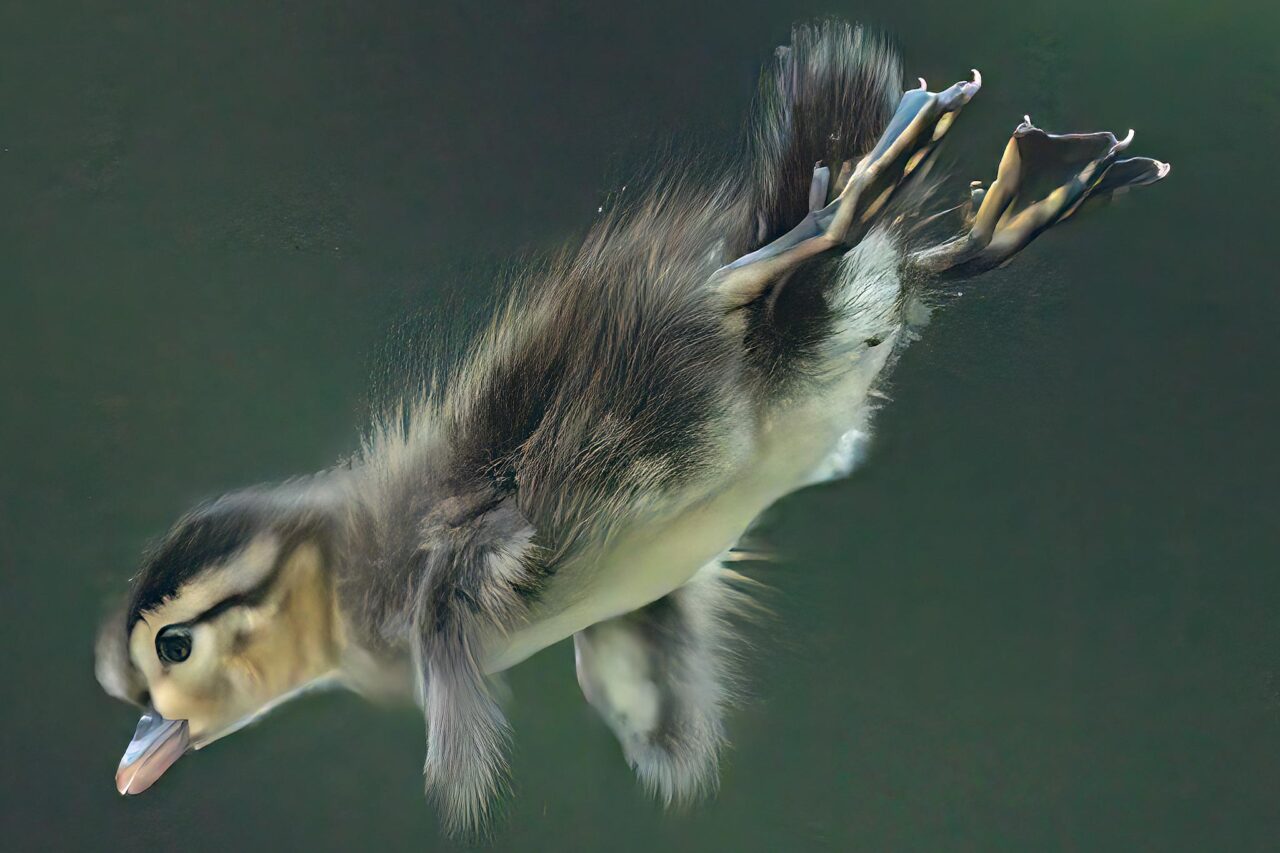
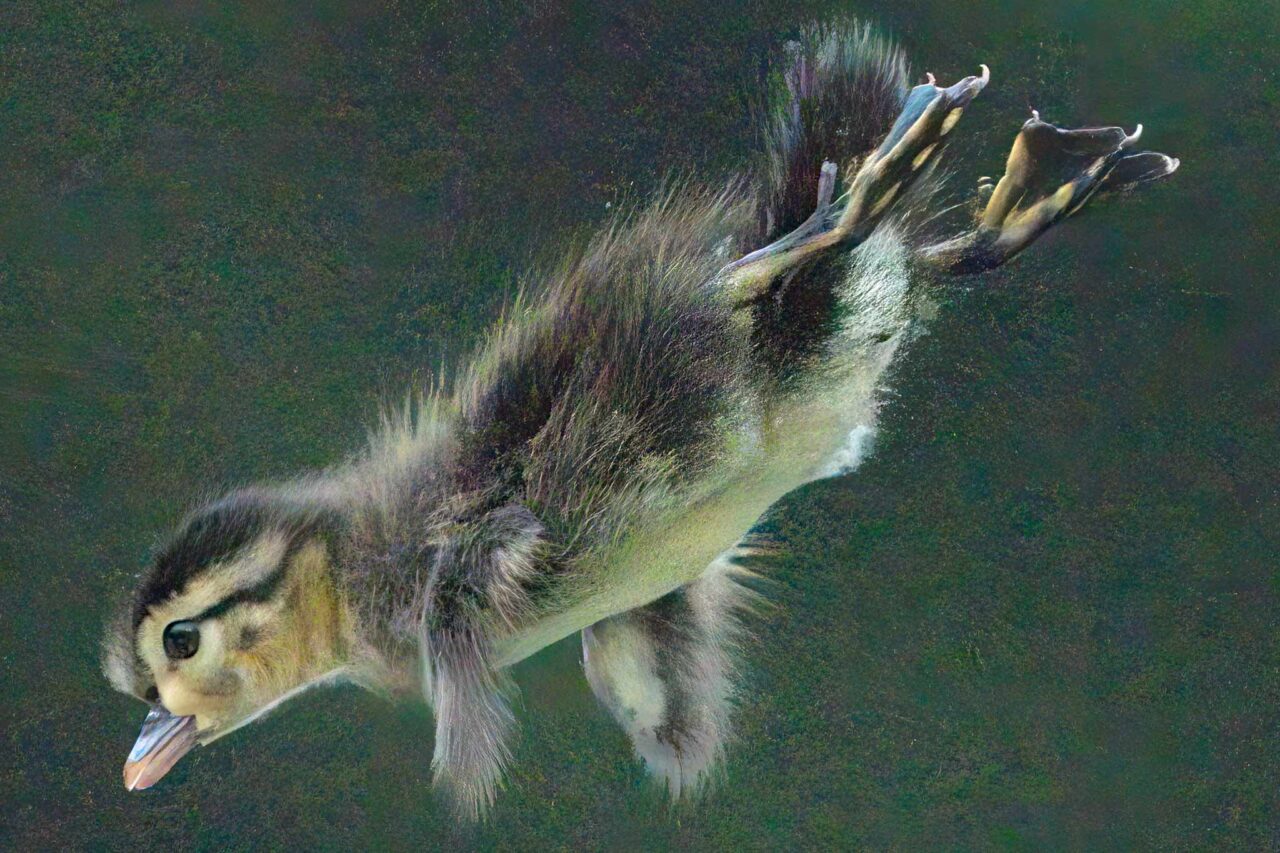
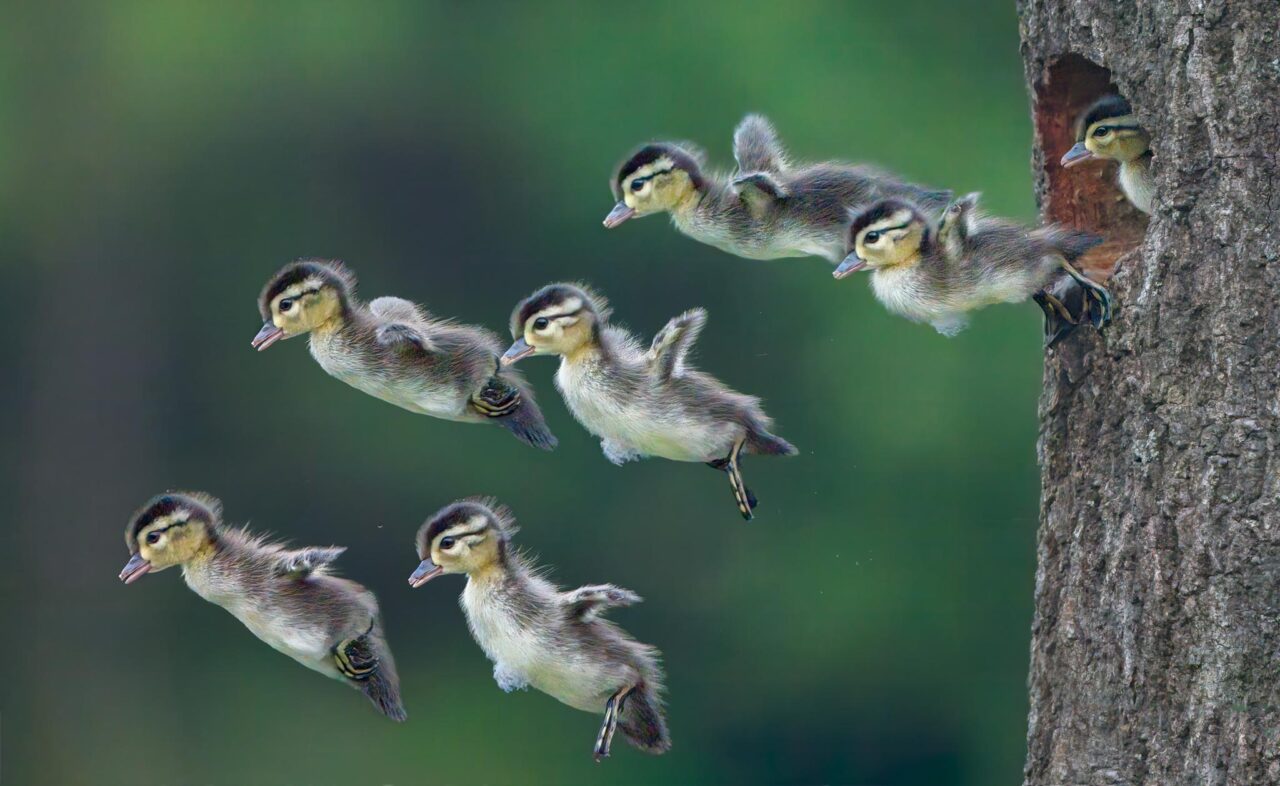
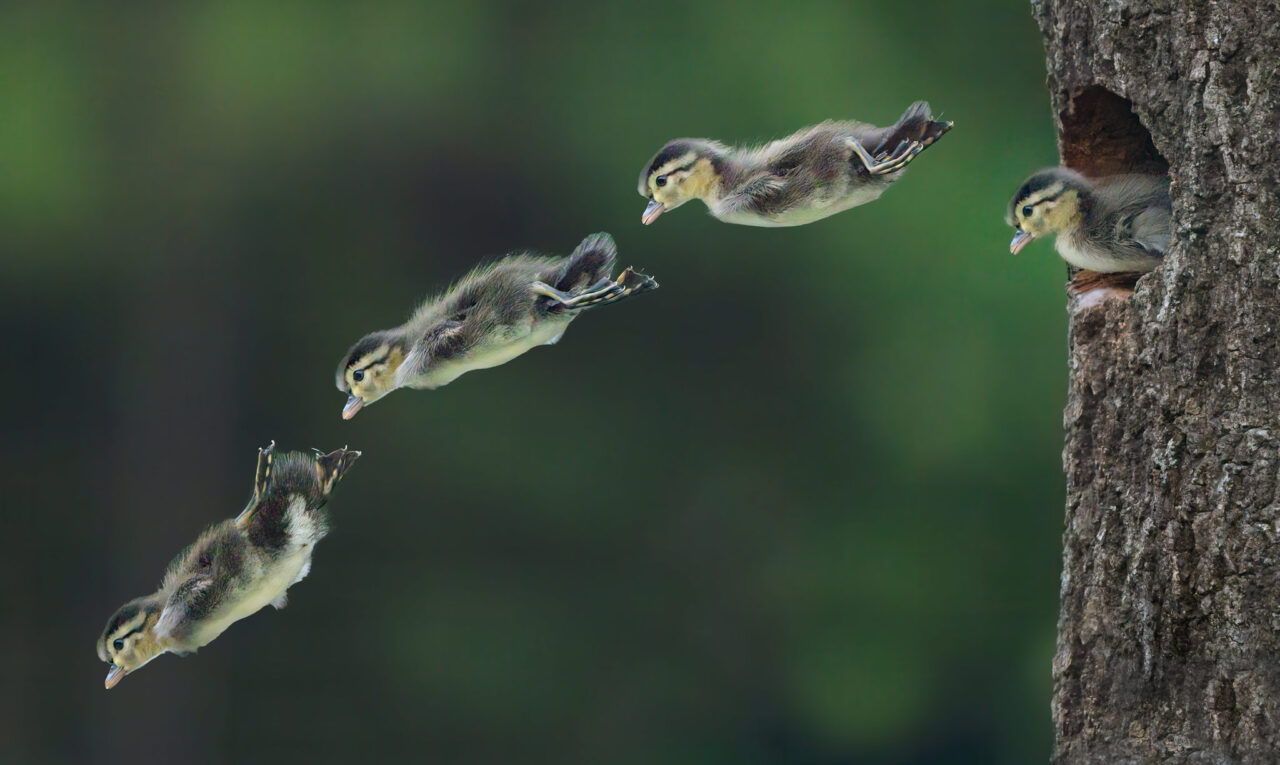
Final processed image is shown below, as well as other images from the shoot. The last two images are composite images of single jump sequences–every other frame from sequences taken at 30 frames per second.

Update
I have started using Topaz Sharpen AI more often in my workflow. I recommend experimenting with its use on images with significant noise. I generally a create a couple of duplicate layers of the imported raw image layer and try Denoise AI on one, a combination of Denoise AI and Sharpen AI on a second layer, and just Sharpen AI on another layer. This approach is somewhat time-consuming, but working to achieve maximum quality for certain images can be worth the effort.