The Ruby-throated Hummingbird is the only species of hummingbird known to occur regularly in my home state of North Carolina. Over the years there have been at least 11 other species documented in the state. Most have been fairly rare visitors but some, such as the Rufous, Black -chinned and Calliope Hummingbirds are becoming more common. However the Ruby-throated hummingbird is the only one known to breed here, and it is the only one I’ve seen.
Hummingbirds are an American bird. All of the estimated 330-340 species are found in North, Central and South America. Only sixteen species breed in North America and the Ruby-throated Hummingbird is the only one that breeds east of the Mississippi River.
I’ve only photographed the Ruby-throated Hummingbird on three to four occasions in the last 30 years. In the back of my mind, I’ve always had an idea to travel to the southwestern United States to photograph the numerous beautiful species there. That trip hasn’t happened yet, so last summer (July 2018) I decided to make a more concerted effort to photograph the hummingbirds in my own yard. To make up for the lack of diversity of species, I decided to see how many different ways I could photograph the subject.
So I brain-stormed and came up with a list of desired images. I’m not going to divulge the whole list here because I haven’t progressed very far down the list at all–I’ve only made it to #3. But I will show some of the favorite images I’ve obtained so far and share some of the methods I’ve used. These images were taken over two three-day weekends in the summer of 2018. On these six days, I spent a good portion of each day setting up and photographing the hummingbirds. Unfortunately, in 2019, I was unable to dedicate much time to continue the project. The one week-end I had planned was ruined by rain.
The first two types of images on the list were among the easiest. They were:
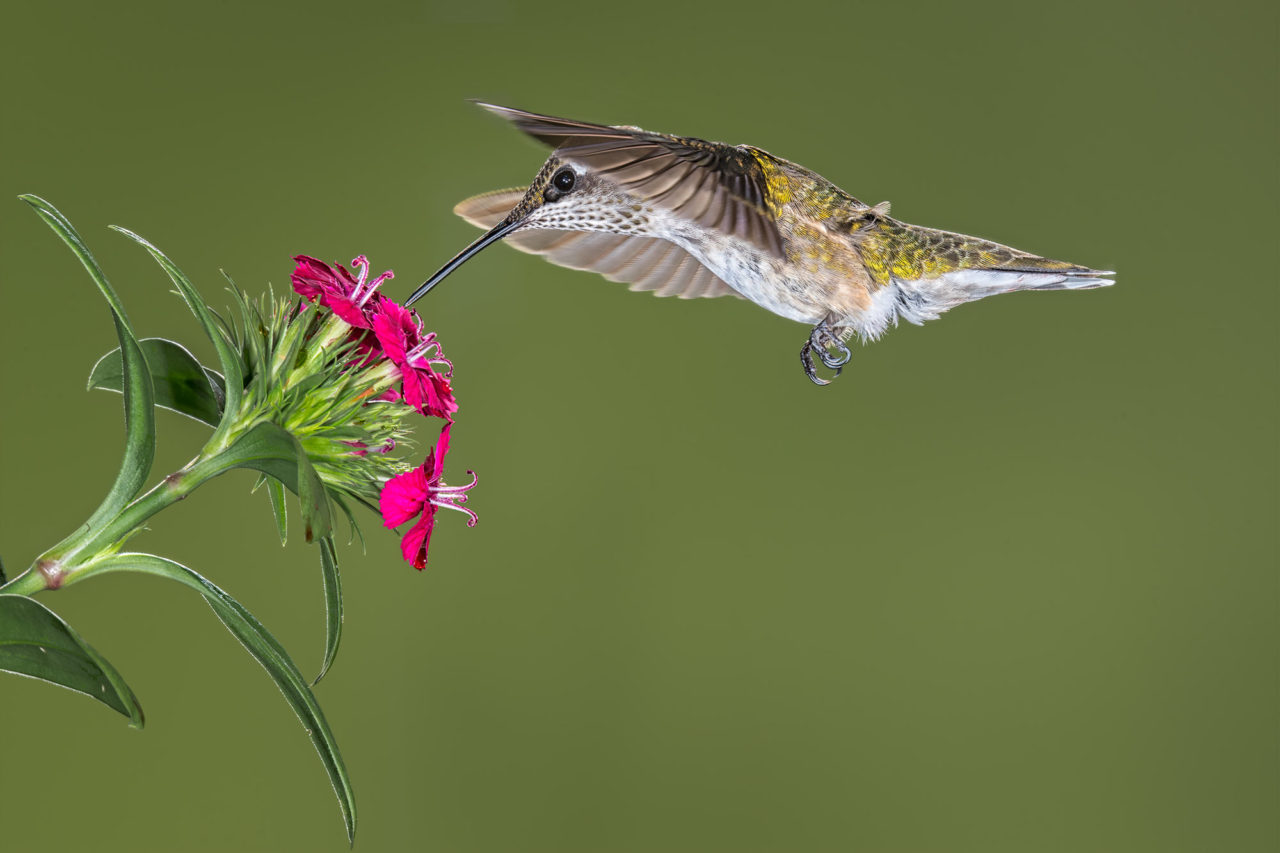
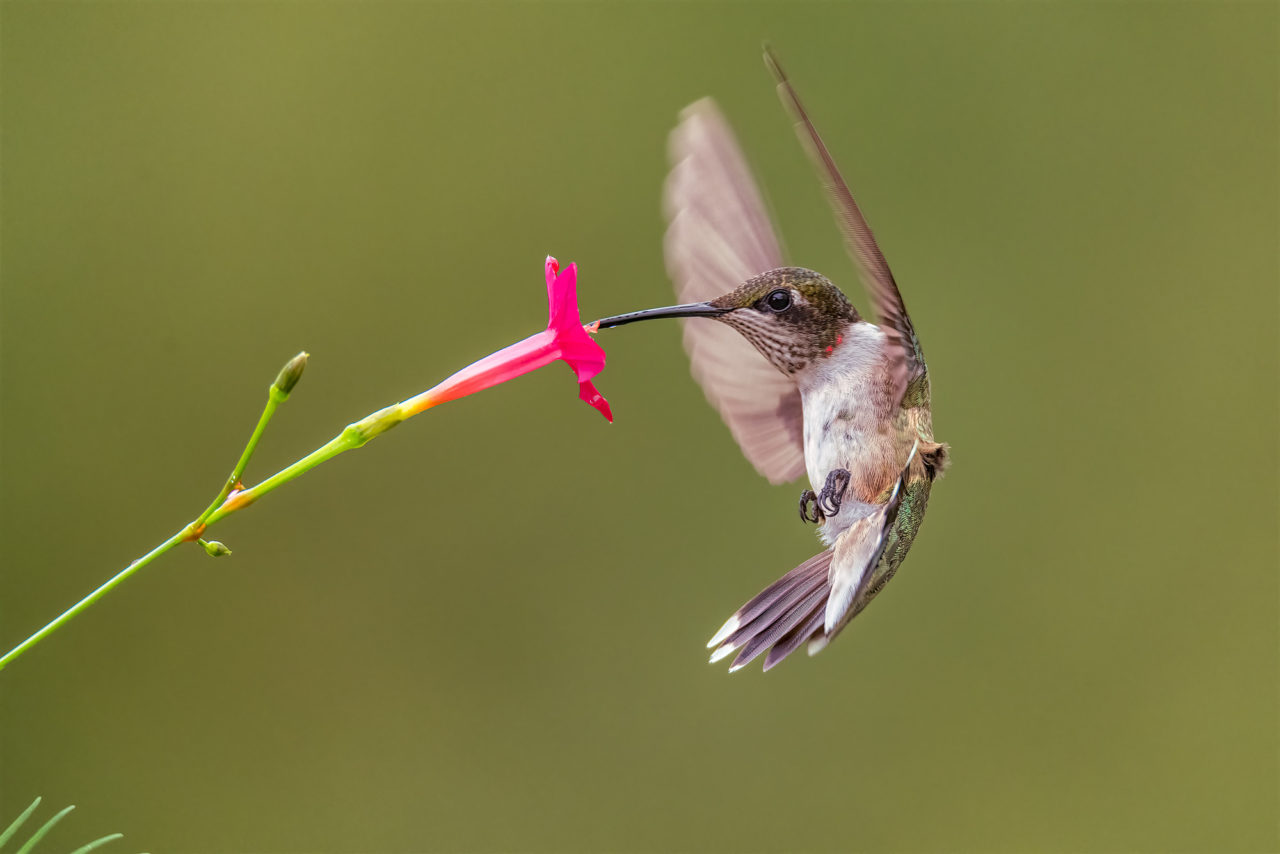
1) Hummingbird in flight, exposed with ambient light and fill flash.
2) Hummingbird in flight, exposed with flash only (multiple flashes used, no ambient light contributing to the exposure).
I spent only two of the six days on these images. The remaining four days were spent on the third type of image:
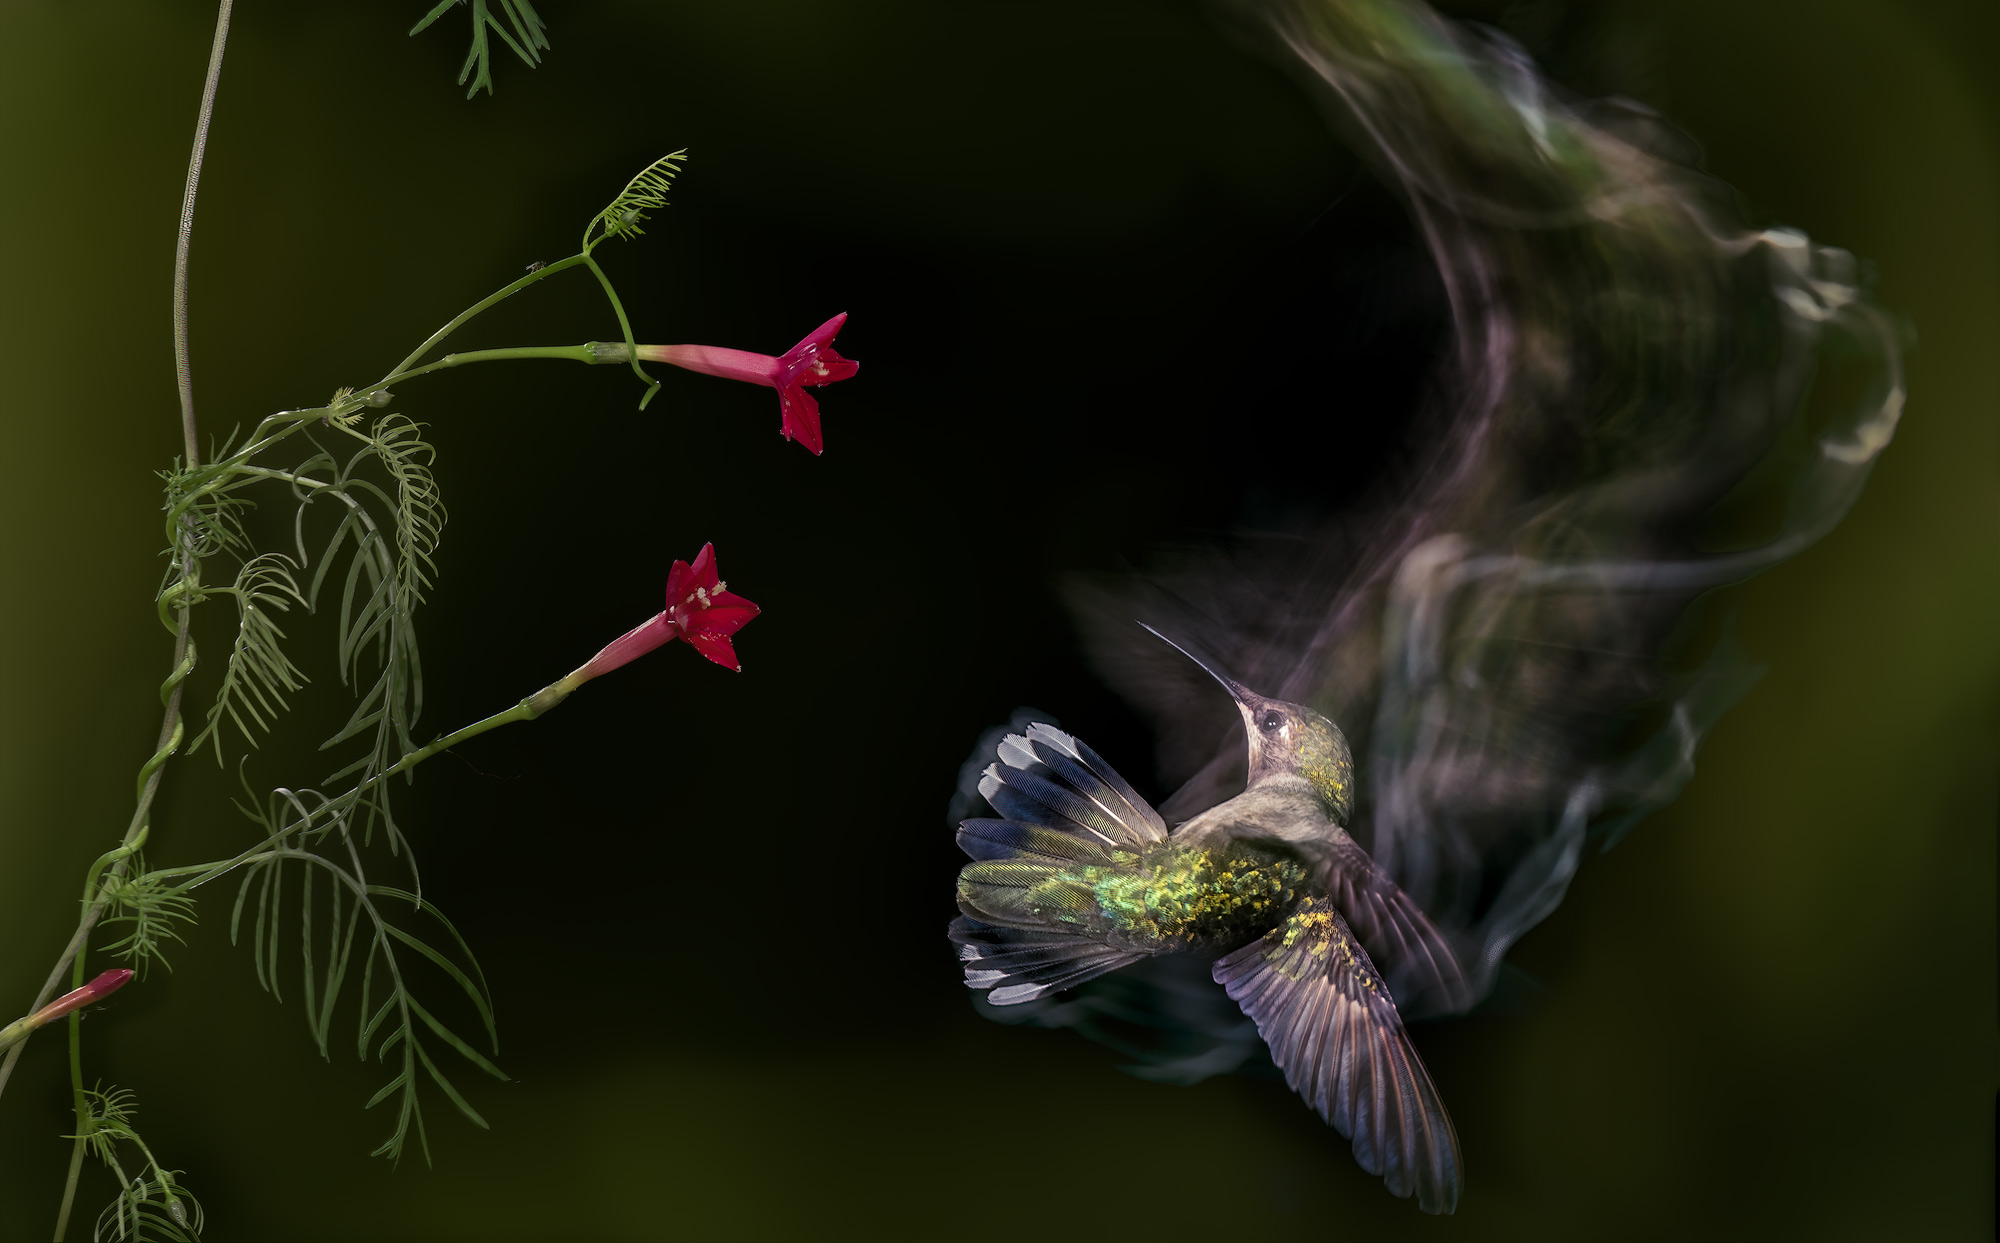
3) Hummingbird in flight–Blur/Sharp , combination ambient/flash exposure with flash exposure equal to ambient exposure.
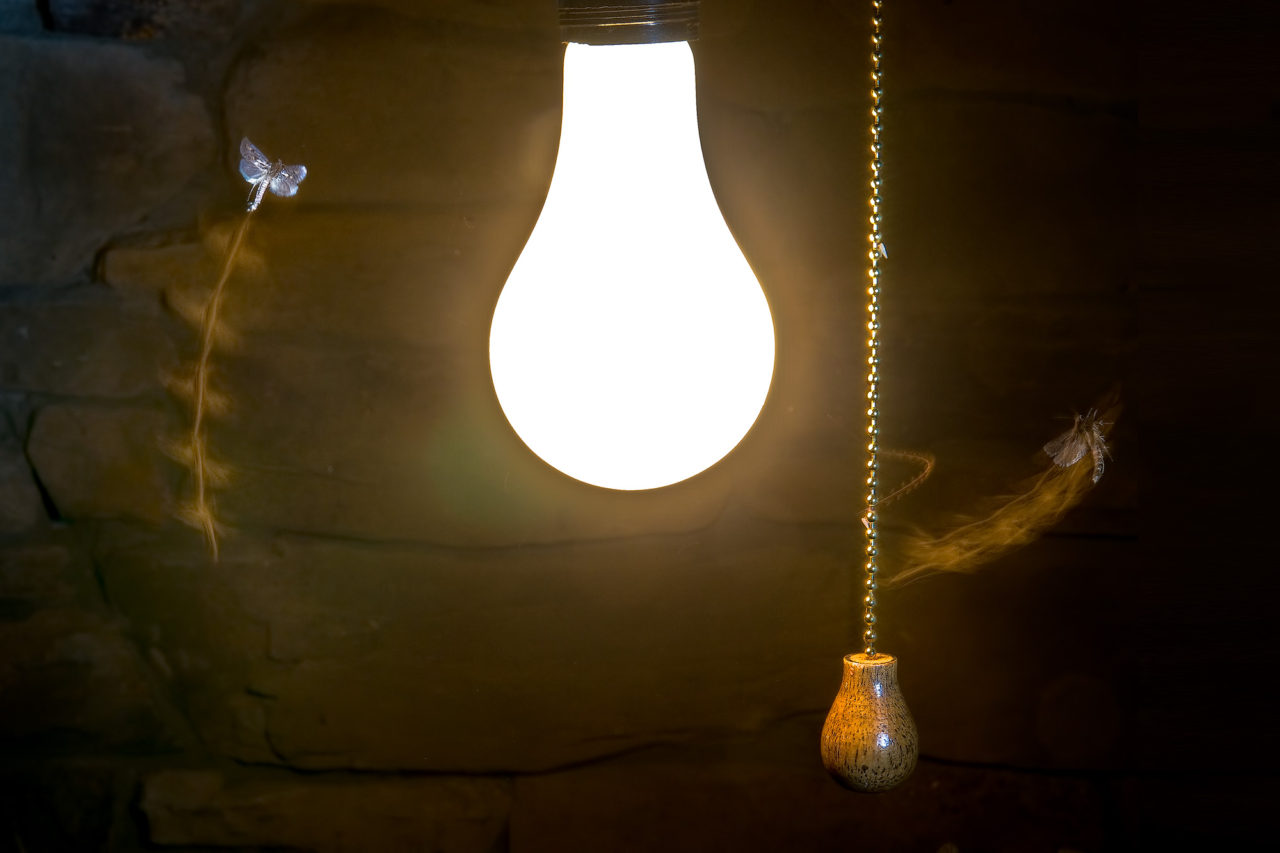
For this third image type, I essentially used the same method I’d used several years ago to photograph the moths shown below, but adapted to daylight conditions and hummingbirds. The ambient exposure was from the light bulb and it illuminated the bulb, the background wall, the chain and the blurred path of the three moths in a 1/10 second exposure. A 1/9000 second flash exposure occurred as the 1/10 second ambient exposure ended. The flash exposure added light to the bulb, the chain, and, most importantly, produced the sharp images of the moths at the end of their flight paths. I had snoots on the two flashes and angled them in order to minimize flash exposure on the background wall.
An Historical Perspective
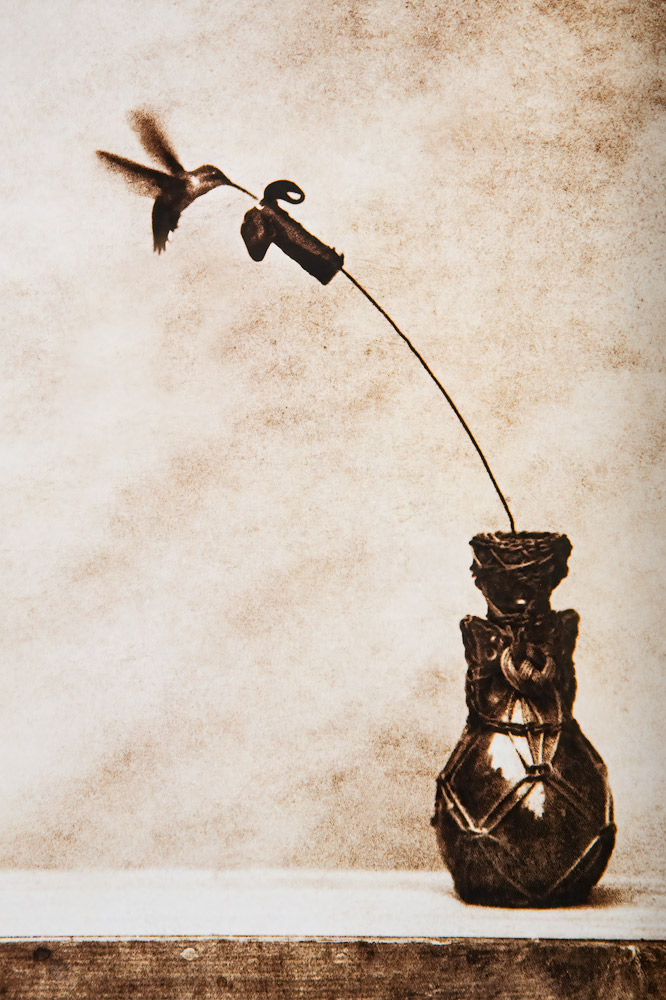
The earliest photograph of a hummingbird in flight that I could find was taken in 1914 by Louise Birt Baynes–a photograph of a hummingbird investigating an artificial flower. It is quite possible that she attracted the hummingbird using a method described by Caroline Soule in the October 1900 issue of Bird-Lore (the first official magazine of the National Audubon Society). In 1889 she created an artificial trumpet creeper flower made from stiff paper. She put a small glass vial filled with a sugar/water mixture inside the flower and placed it among some natural trumpet creeper flowers in her yard. She soon found her backyard hummingbirds preferentially feeding from her offering.
Caroline Soule was not the first to feed hummingbirds but her article in a national magazine disseminated the information to many others. There are several earlier reports of the use of artificial feeder solutions to attract hummingbirds. The earliest are described by John James Audubon in his Birds of America. In 1821 he witnessed individuals in Louisiana capturing hummingbirds by placing wine in flowers. The birds would become intoxicated and fall to the ground. He also described captive birds being fed sugar or honey dissolved in water placed in artificial flowers.
Preliminaries for Hummingbird Flight Photography
The easiest way to make images of hummingbirds in flight is to photograph them at a feeder. I had two feeders set up in my yard, about 30 yards from one another. I left one feeder alone. If a hummingbird was reluctant to visit the feeder site I was photographing, I wanted an alternative food source available. In addition to the feeders there were several natural flower sources of nectar in my yard. Even with these alternative food sources available, I had no shortage of hummingbirds coming to the feeder I was using. The hummingbirds came to my feeder all day, but activity was much greater in the early morning and late afternoon.
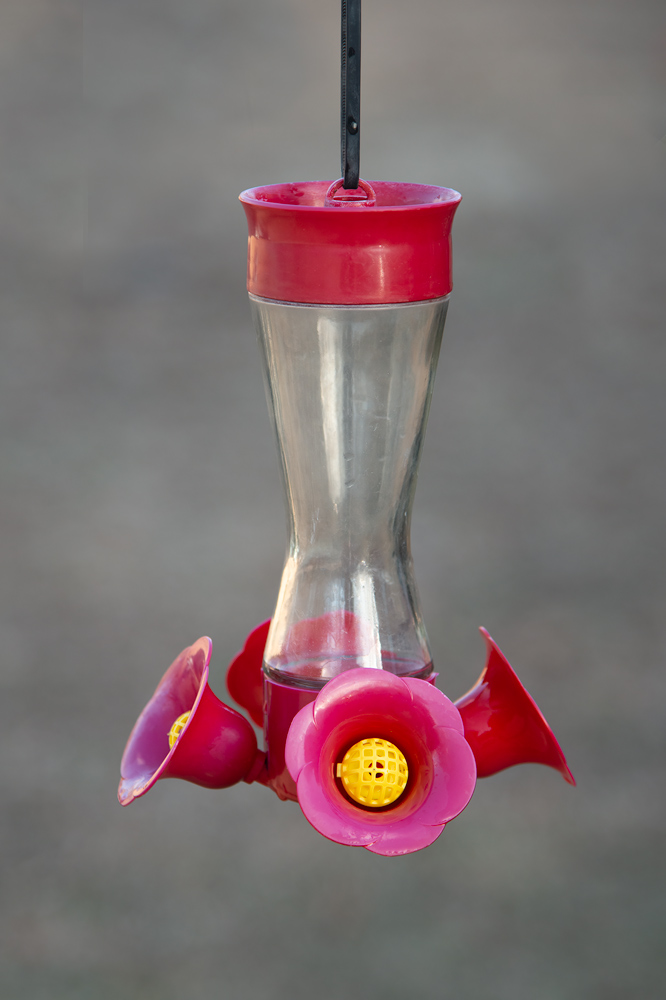
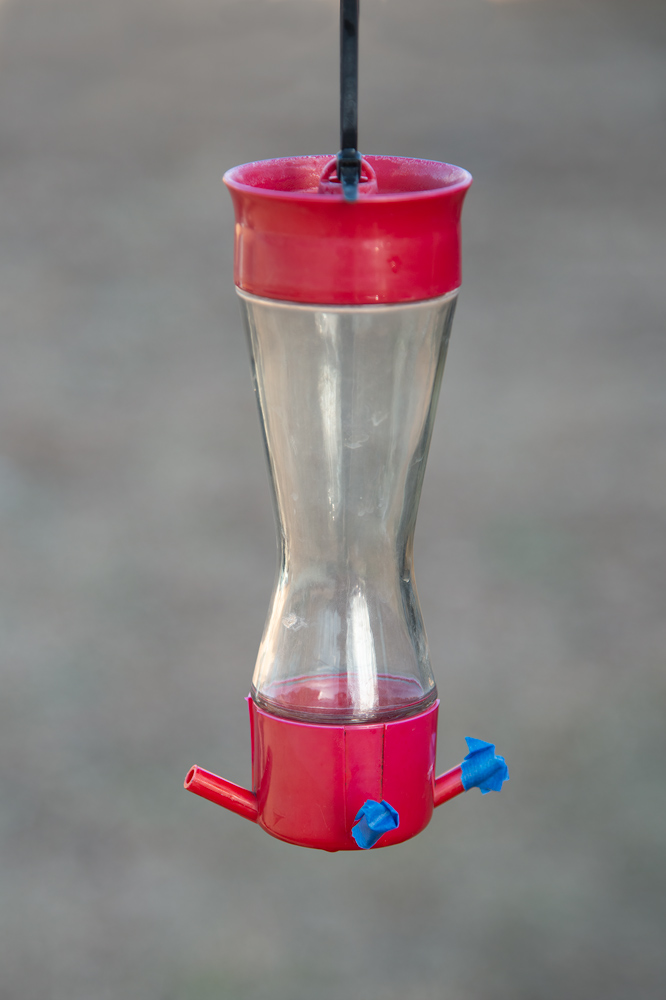
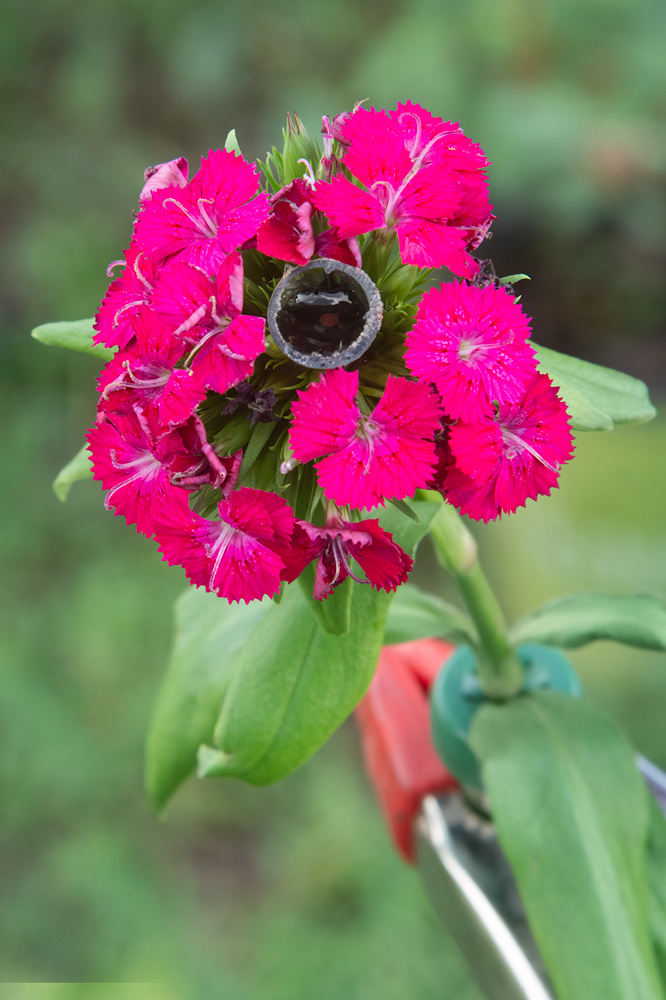
Images of the Perky Pet feeders I used are shown below. Prior to a photography session, I removed the plastic flowers off one feeder (they slide off to facilitate cleaning) and closed off all the feeding ports except one with painter’s tape (doesn’t leave a sticky residue). Closing off the other ports ensured the hummingbird would come to the area I was focused on. The reason I removed the plastic flowers was to make it easier to get an image of a hummingbird in flight without the feeder showing. Hummingbirds will often hover and feed, back up, then move forward to feed again. Take your shots when the hummingbird backs up. You can also slide a tubular flower over the feeder port (although it will generally wilt fairly quickly).
Two pests that can cause problems with hummingbird feeders are ants and wasps or bees. To prevent ants from getting to your feeder, place an Ant Moat above your hanging feeder. Another solution is to to place TangleFoot on the support pole. TangleFoot is a sticky material that will entrap the ants. You want to make sure you use a small amount that completely encircles the pole and that it covers no more than an inch of pole length. Also make sure that it is placed in an area where a hummingbird is not at risk of coming into contact with the material. I place it low on the pole, near the ground.
I find wasps and bees to be less of a problem as long as there are multiple feeders and multiple feeding ports. The only time I’ve found them to be problematic is after I’ve started my set-up up for photography. I usually close off all the feeder ports but one a day ahead of my planned photography session. I want the birds to get used to going to the one feeder port. However when you only have one feeder port, that is when you don’t want a wasp or bee dominating the feeder and keeping the hummingbirds away. I haven’t found a good solution, other than a fly swatter.
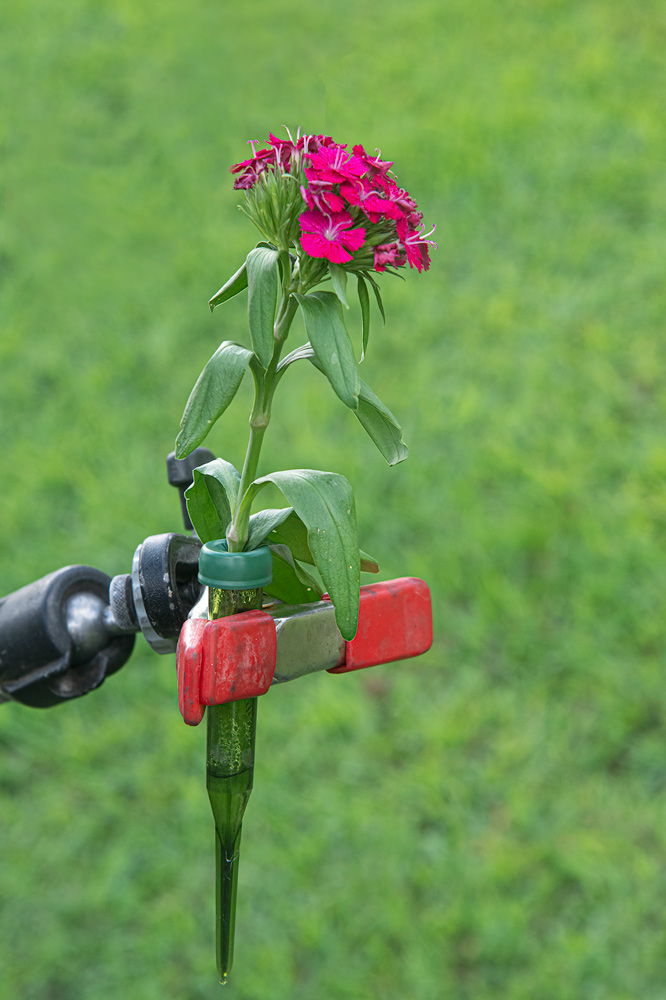
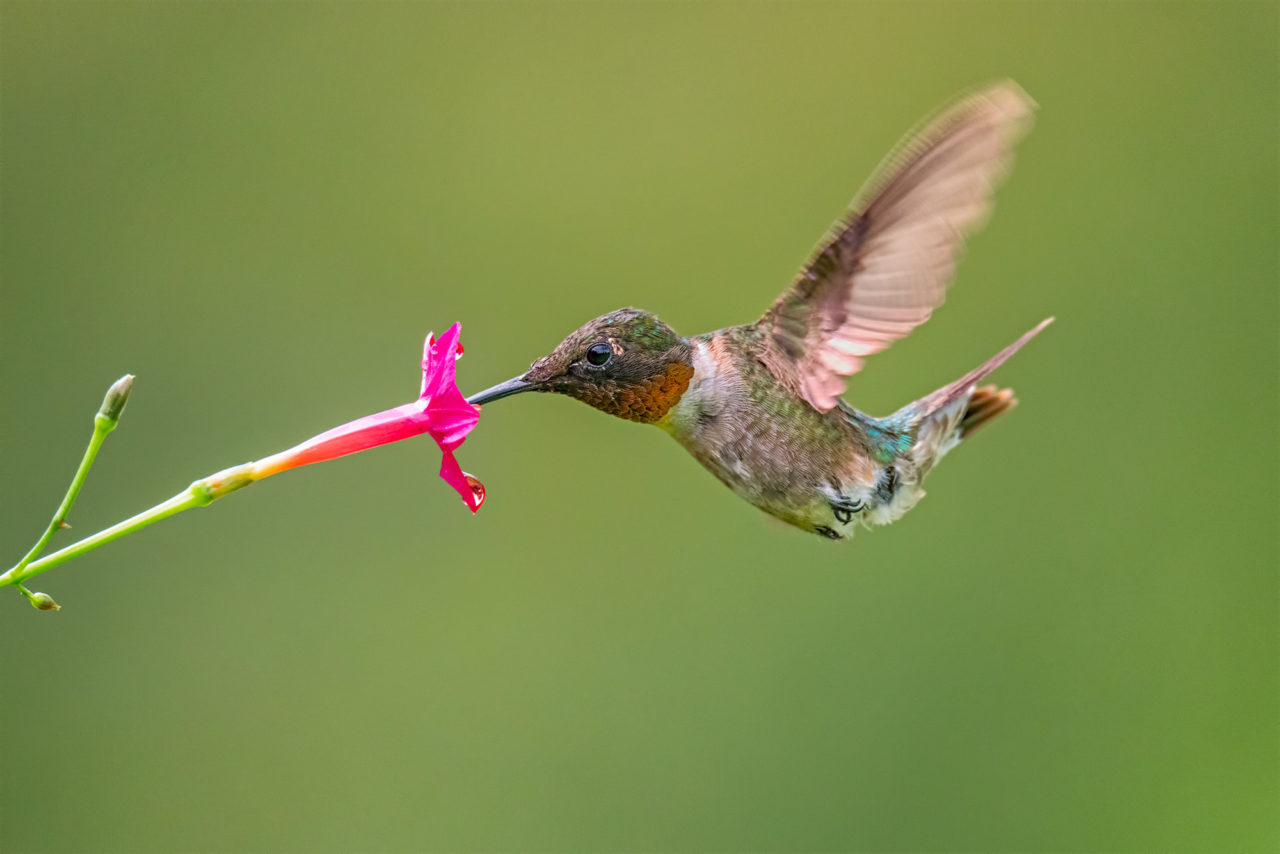
When I’m ready to photograph, I generally remove the feeder and replace it with a real flower. One method is to use potted flowers. Use a wire or stick to project one flower or cluster of flowers away from the others. Use an eyedropper to periodically add some hummingbird solution to a single flower or small cluster of flowers.
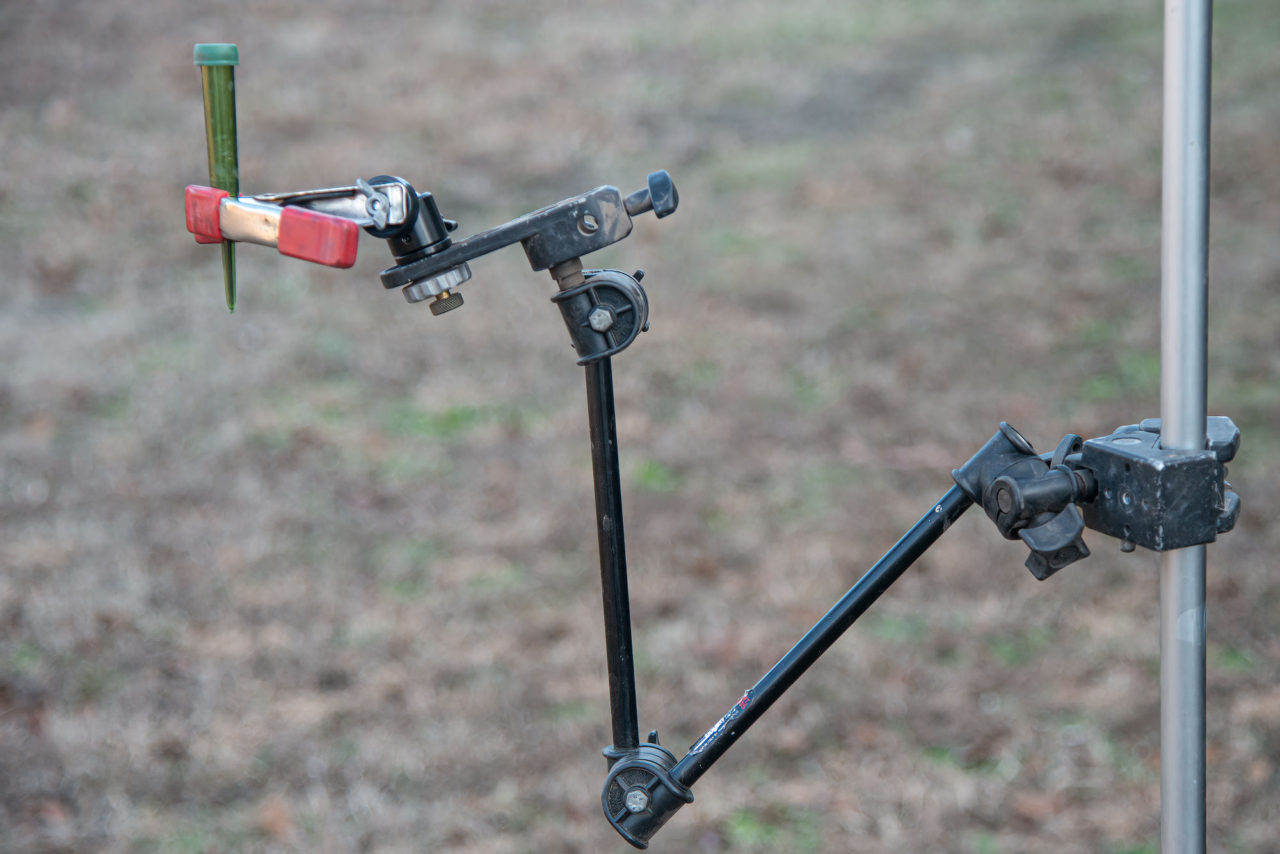
The other method is to use cut flowers in place of the feeder. The big disadvantage of cut flowers over potted flowers is that the flowers will wilt and have to be replaced. Place the flower in a florist tube containing water and flower preservative. One can use a Plamp, Manfrotto Magic Arm, Manfrotto Articulating Arm, or a mini magic arm (from a number of different manufacturers) to hold the florist tube.
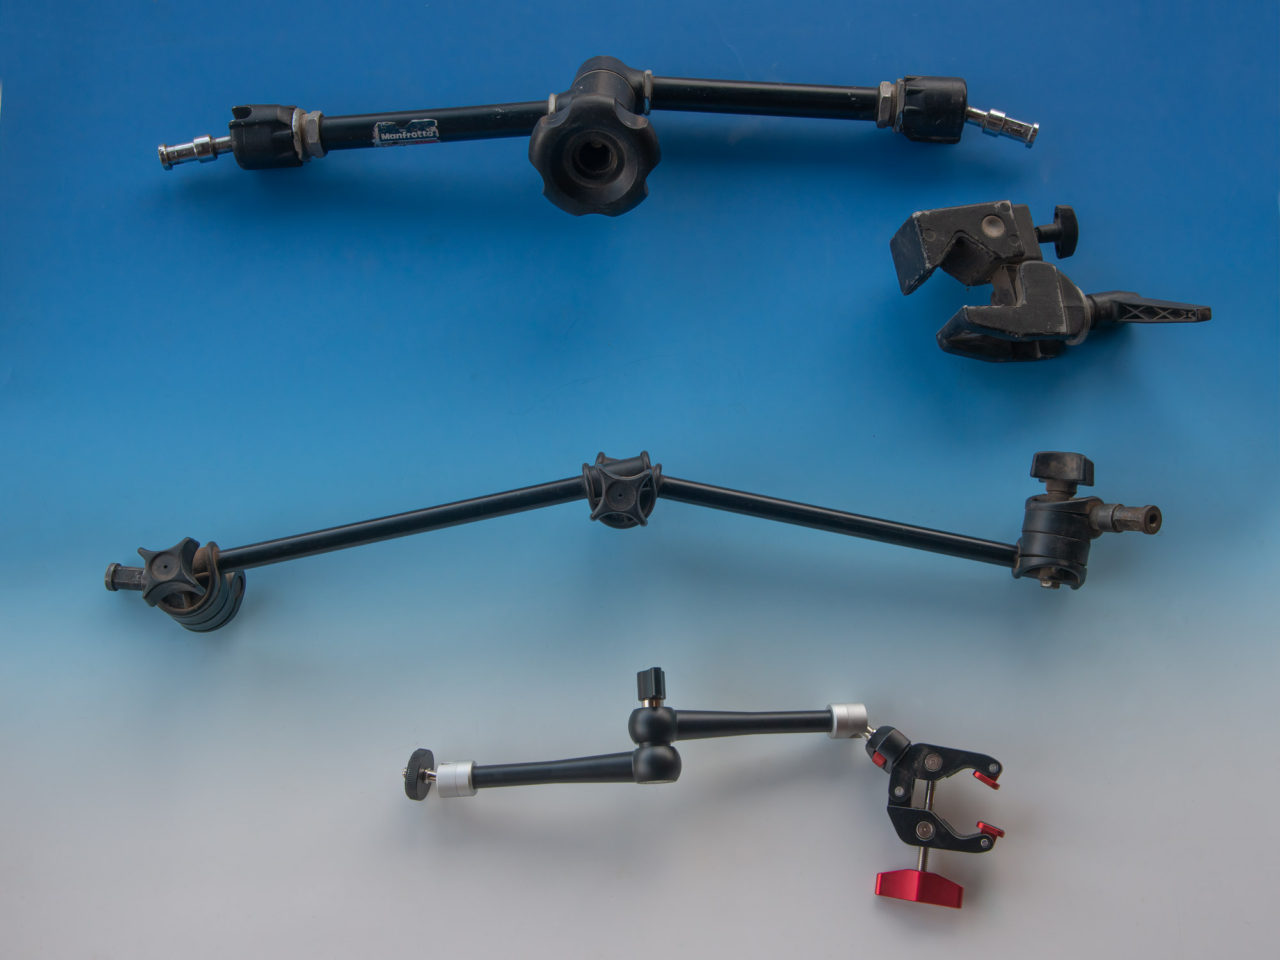
The image above shows, from top to bottom, the Manfrotto Magic Arm, the Manfrotto Articulating Arm and the Neweer 11 inch Mini Magic Arm. The Manfrotto Super Clamp at the upper right attaches to either the Manfrotto Magic or Articulating Arms. All of these arms will clamp to light stands or tripods at one end and, using various attachments, hold the florist tube or flashes on the other end. The mini magic arms are definitely the most cost effective option.
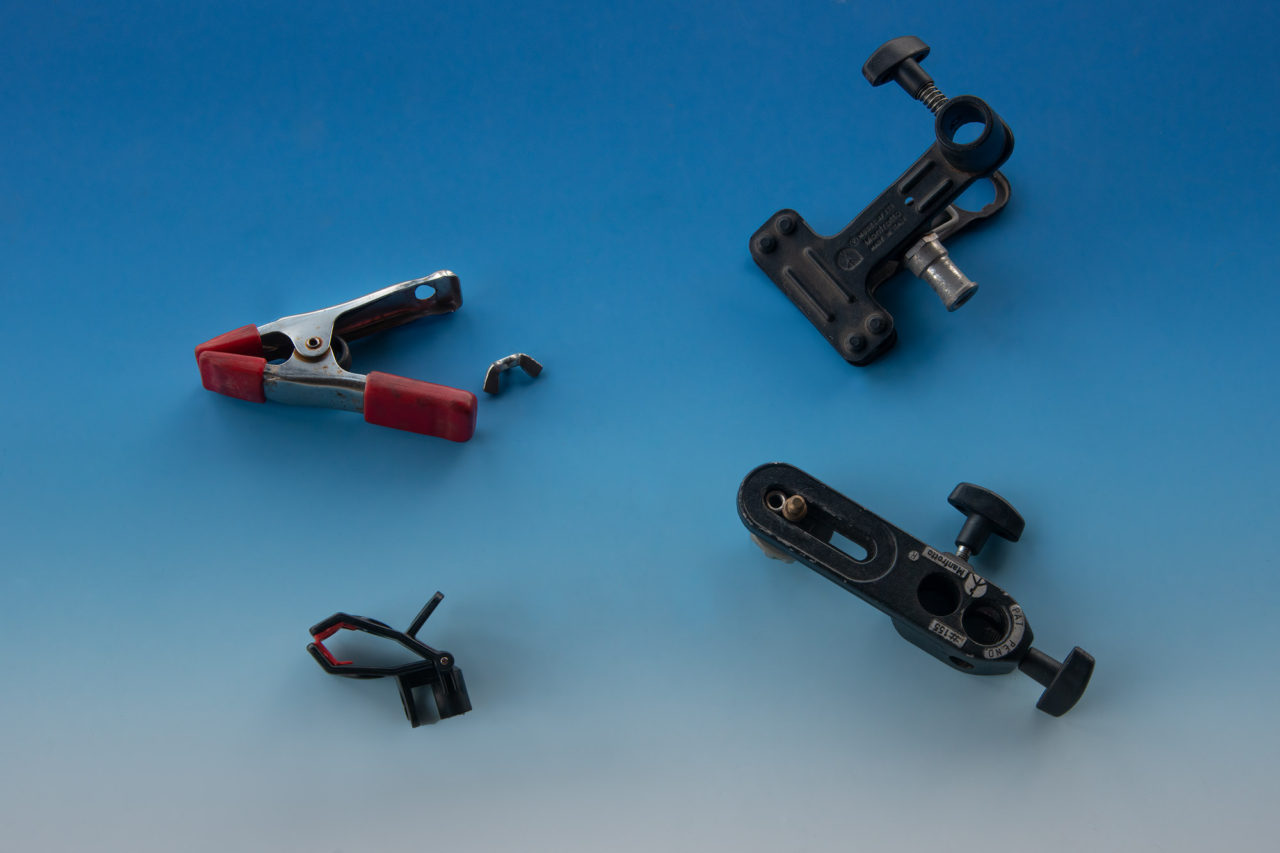
The above image shows, clockwise from upper left, a a modified spring clamp from a hardware store, a Manfrotto 275 Mini Clip Clamp, Manfrotto Camera Bracket for Magic or Articulating Arm, and an unknown clamp ( I think I picked it up in the bargain bin at a local camera store). The modified spring clamp can be attached with a wing nut to a small ball head or the Manfrotto Camera Bracket.
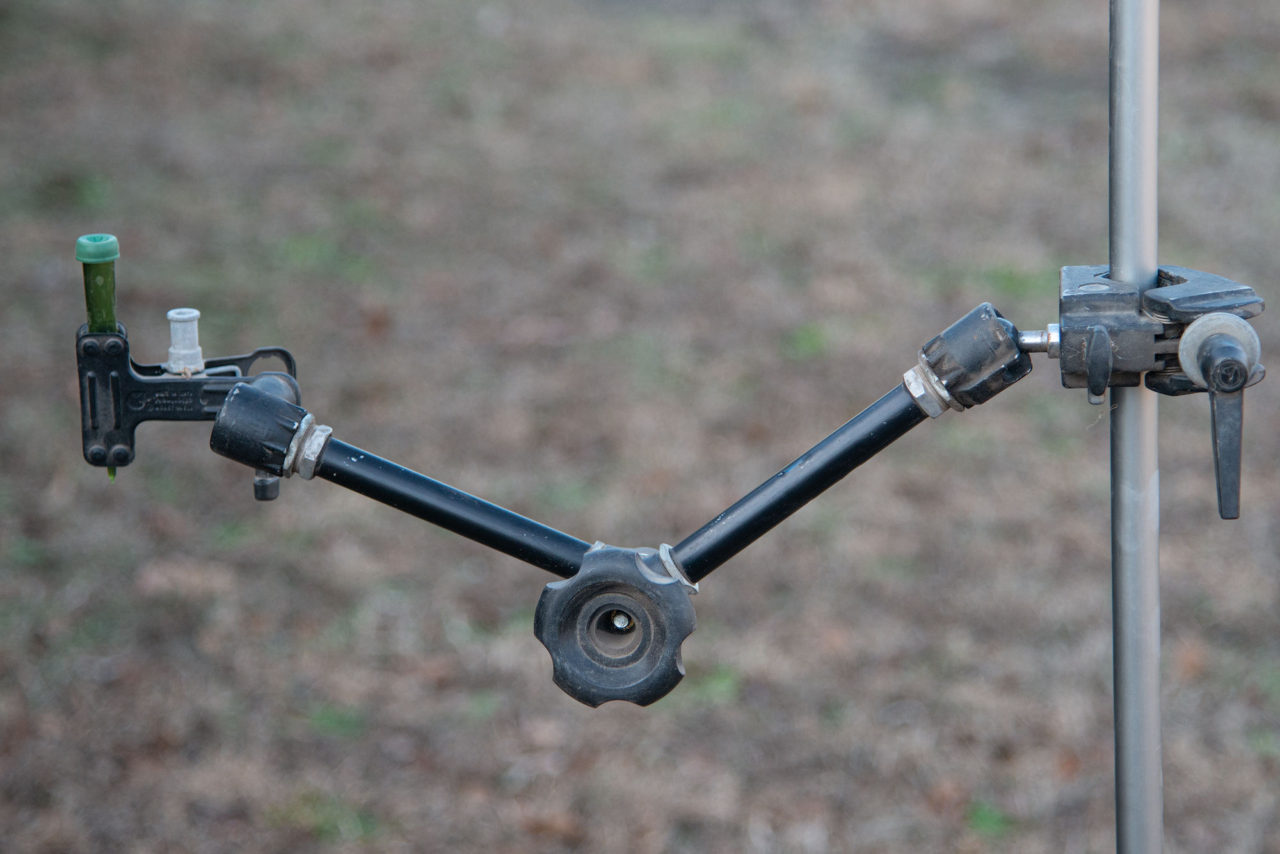
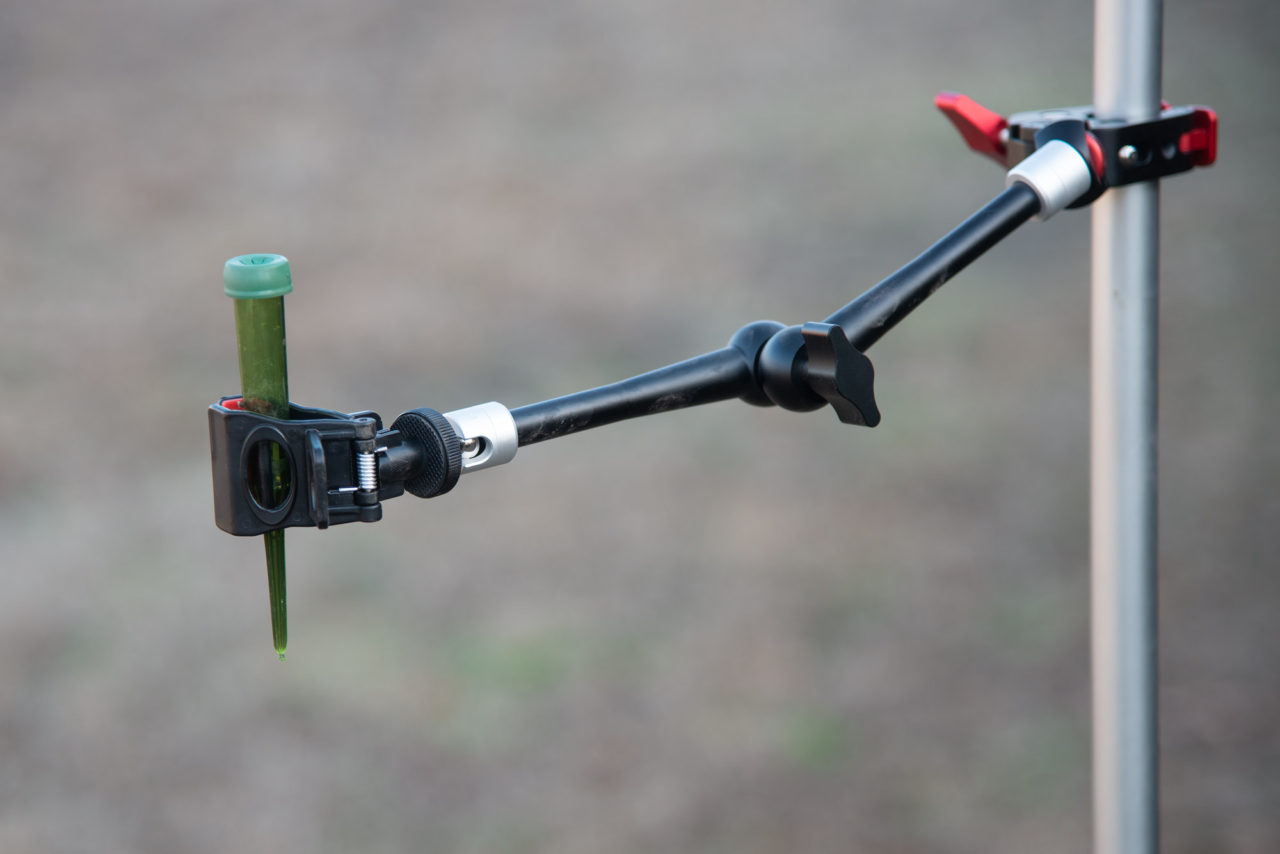
Above images show the various arms holding a florist tube. These arms are also great for holding flashes.
A few tips for using a cut flower with a florist tube: If a cut flower has been out of water for more than a couple of minutes, air can block the water-conducting tissues and prevent water uptake by the flower. To remedy this problem, cut off a portion of the stem before placing in florist tube. To ensure the flower remains fresh as long as possible, remove any excess leaves or flowers not needed. Add a flower preservative to the water in the tube to prolong freshness.
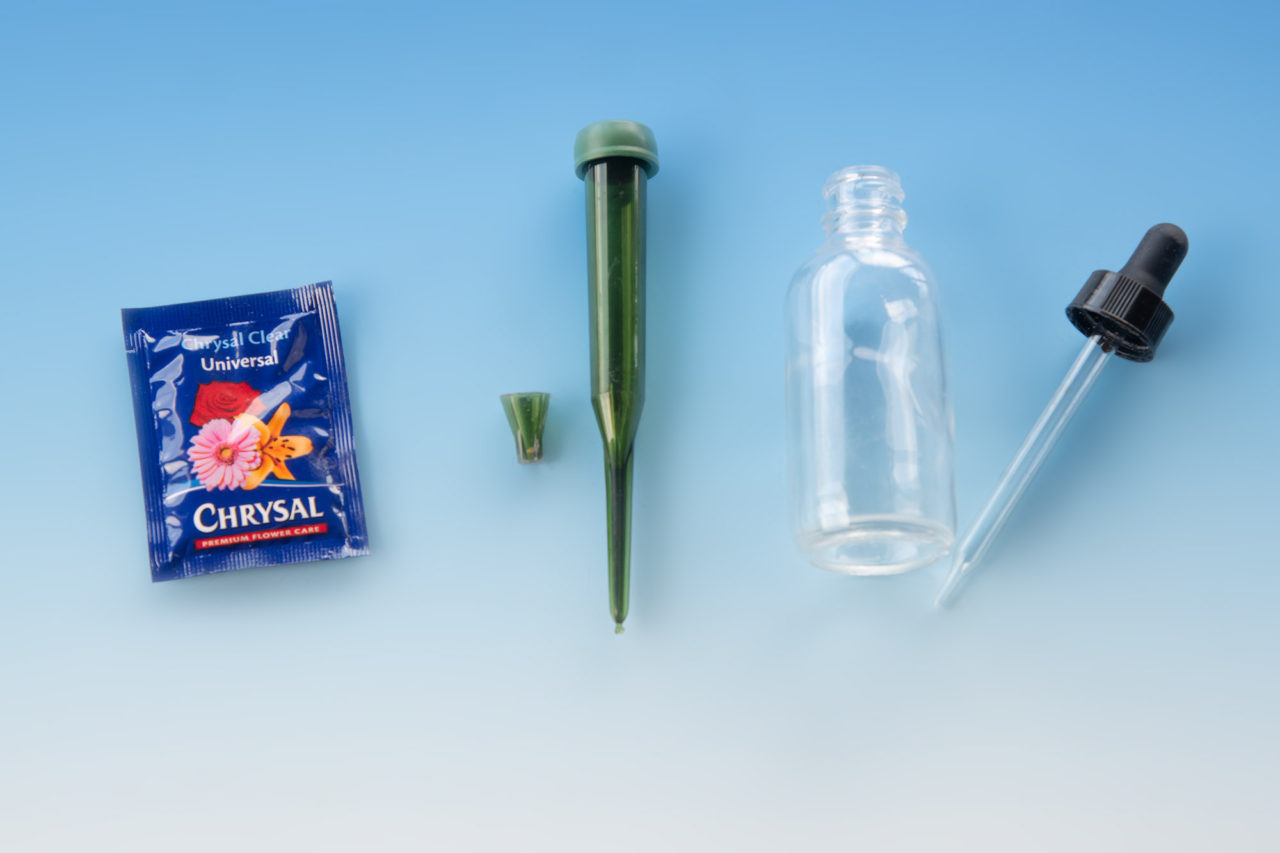
Left to right above, a packet of flower preservative, cut section of florist tube (use explained below), florist tube, and bottle with eye dropper. The eye dropper is used to add a few drops of hummingbird solution to the flower.
If you are using a cluster of flowers, it may be possible to hide a small receptacle within the cluster to hold the feeder solution. I cut off a section of a florist tube to create the small container shown in the second image below. The cap that covers the needle of a tuberculin syringe works even better. It can be cut to a shorter length if desired.
I use a 1:4 ratio of sugar to water for my feeder solution. One reference source recommended replacing the 1:4 solution with a 1:5 ratio solution for photography sessions. Supposedly the hummingbirds will have to visit the feeders more frequently when a less concentrated solution is used. I have not tried this technique.
To make your feeder solution, first boil a 1:1 or 1:2 sugar/water mixture to fully dissolve the sugar and, more importantly, kill any bacteria, mold or yeast spores in the sugar, thus slowing fermentation. Dilute with water to 1:4 ratio. You can store any excess in a refrigerator for up to a week.
Do not use the solutions with red dye, as it is reportedly a carcinogen. Also make sure you clean your feeders regularly. If temperatures are in the 60’s, then cleaning once a week is probably fine. In the 70’s and above, clean your feeders at least twice a week. I have 4 feeders, but only two are out in the yard at a time. When it is time to clean a feeder, I replace it with a fresh clean one. The old feeder is then soaked in a 10% bleach solution for at least an hour then cleaned with a brush, rinsed and air dried. It is then ready to be used the next time the feeders need replacing.
Lens Choices:
A moderate to long lens is recommended. You want to be far enough away that your presence does not keep the birds off the feeder. I personally prefer zoom lenses over prime telephotos for my wildlife photography. I like the compositional flexibility that a zoom lens offers. In hummingbird photography a zoom lens will allow you to zoom out wider if you happen to encounter two birds interacting. It will also allow you zoom in or out for different size hummingbirds if you are photographing in an area with multiple species.
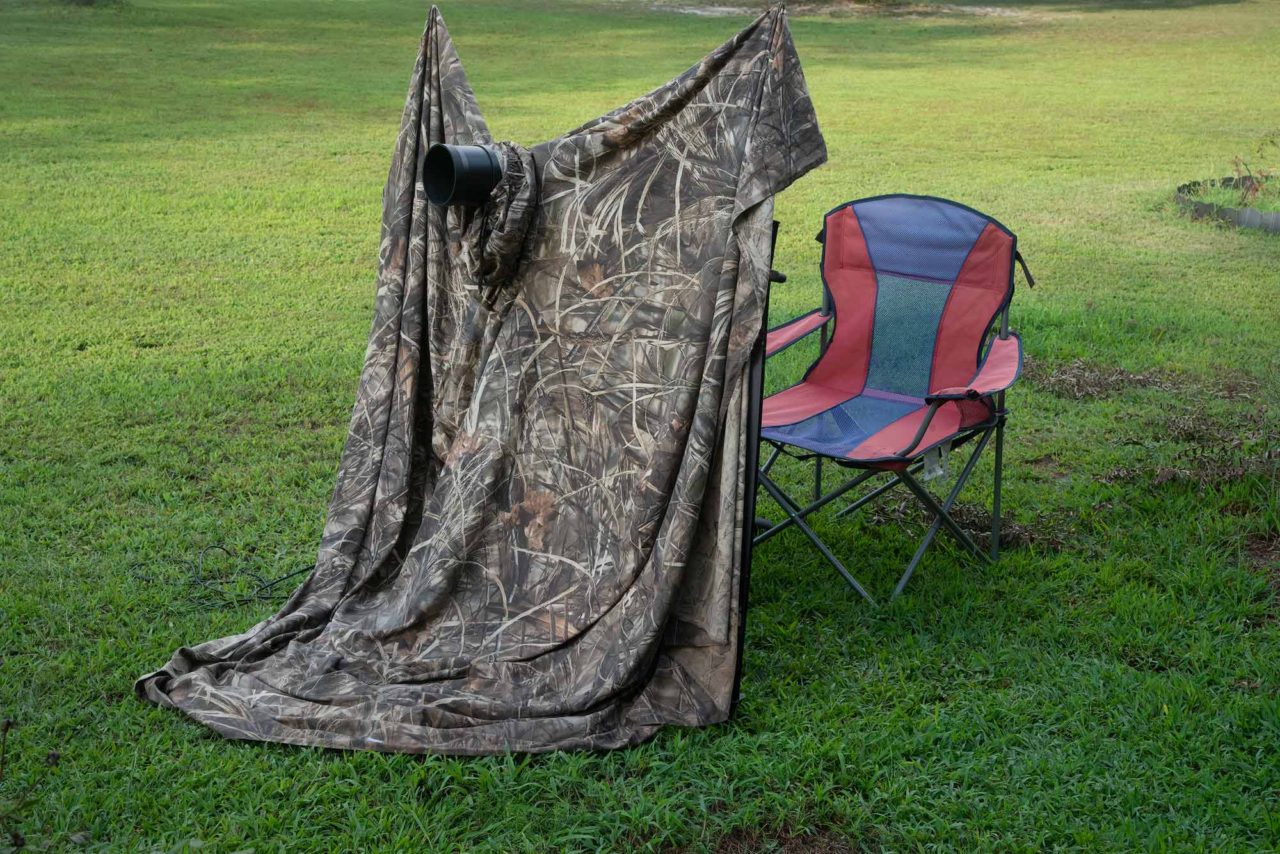
The two lenses I used were the Sigma 300-800 f5.6 and the Sigma 150-600 f5.0-6.3 Sport. The 150-600 has a closer near-focusing distance than the 300-800, so I was actually able obtain a larger image size with the 150-600. I found that my presence seemed to bother the hummingbirds somewhat so I used a bag blind draped over my tripod and two stakes to create an area to “hide” behind, which helped in my situation.
Focusing methods: You can use either auto-focus or manual focus for your hummingbird photography. I actually used both and will describe the situations I used each in more detail later.
If you use auto-focus, you’ll want to use the AF setting that has the fewest number of active AF points that you can reliably keep positioned on the bird’s head. Generally AF will be faster and more responsive when fewer focus points are active. Photographing the hummingbirds with my Nikon D850, I typically used Group AF (13 focus points) or 9- or 25 point Dynamic Area AF modes. Since hummingbirds are in constant motion, you’ll also want to make sure you are in Continuous AF mode (AF-C for Nikon, AI Servo for Canon).
If your lens has a focus limiter switch, see if it allows you to restrict the focus distance to a narrower range that includes the distance to your hummingbirds. Unfortunately the Nikon telephotos I’ve seen aren’t useful, providing only two range choices: a full range from near to infinity and a distant range, such as 8-10m to infinity. I believe many Canon telephotos have three ranges to choose from: full, a near range, and a distant range. For example, the Canon 600mm f4.0 has the following ranges: Full (5.5m to infinity), 5.5m -16.2m and 16.2m-infinity.
My Sigma 150-600 also has three focus range settings: Full, 2.6m-10m and 10m-infinity. However you can also create a custom focus range with the Sigma USB dock. This custom range will be assigned to one of the lens custom function settings, C1 or C2, giving you four ranges to choose from. For example, if your feeder is 4m from your camera, create a custom range setting of 3m-5m.
The advantage of a restricted focus distance range is that if you lose focus on the bird, the limited range should enable the camera to reacquire focus faster.
With the preliminary discussion out of the way, we will now move on to discuss the methods I used for the three image types I photographed.
Hummingbird in Flight: Ambient Light with Fill Flash
For ambient light photography, your feeder should be positioned so that it receives both morning and afternoon light. On sunny days you can photograph from one side of the feeder in the morning and the other side in the afternoon. On overcast days you can photograph all day from the same position. When you position your camera for photography, make sure you have a pleasing background for photography.
The simplest method to obtain a nice background for your image is to ensure that the background is quite distant and of a pleasing color. If the background is distant enough you will have a soft out-of-focus background in your images.
Trying to create pleasing hummingbird images with a detailed background is more difficult. Any element within the image frame is part of the composition. That element can add to image appeal, detract from the image, or be compositionally neutral. We’ve all heard the adages “keep it simple,” or “less is more” in terms of image composition. I don’t necessarily think these “guidelines” are true, but they reflect the fact that it is easier to make a composition “work” when there are fewer elements within the frame. It is much harder to create a pleasing composition when there are more pieces to the puzzle, especially if you have to deal with the pieces as they lie and can’t move and re-position them. In hummingbird photography we can stage our scenes somewhat by moving the feeder or adding potted plants to the background, but still simple backgrounds are easier to use. All my images in this article use simple backgrounds. However my list of desired hummingbird images for the future does include some with more involved backgrounds.
Once your camera and lens are properly positioned for image size and background, replace the feeder with a flower or flowers and you are ready to begin.
Camera Settings: Shutter Speed, Aperture, ISO, Focus Mode, Flash.
Shutter Speed: The shutter speed is the first camera setting to consider. Unless you are trying for some special effect, you want the hummingbird sharp in your image. If your focus is accurate, then the shutter speed is the major determinant of the bird’s sharpness. So how fast does the shutter speed need to be? Well that depends. If you want the entire bird sharp including the wings, then you’ll need a very fast shutter speed. There is some variation in opinion among photographers as to what shutter speed is needed to stop the wing motion of a hummingbird. Marie Read, author of Mastering Bird Photography, recommends a minimum speed of 1/2000s but prefers 1/3200s or faster. Noted hummingbird photographer Roy Dunn states that 1/2000s will stop wing motion at the top or bottom of the wing beat, but will show motion blur in between. Other photographers claim that 1/4000 to 1/8000s is necessary to truly freeze wing motion.
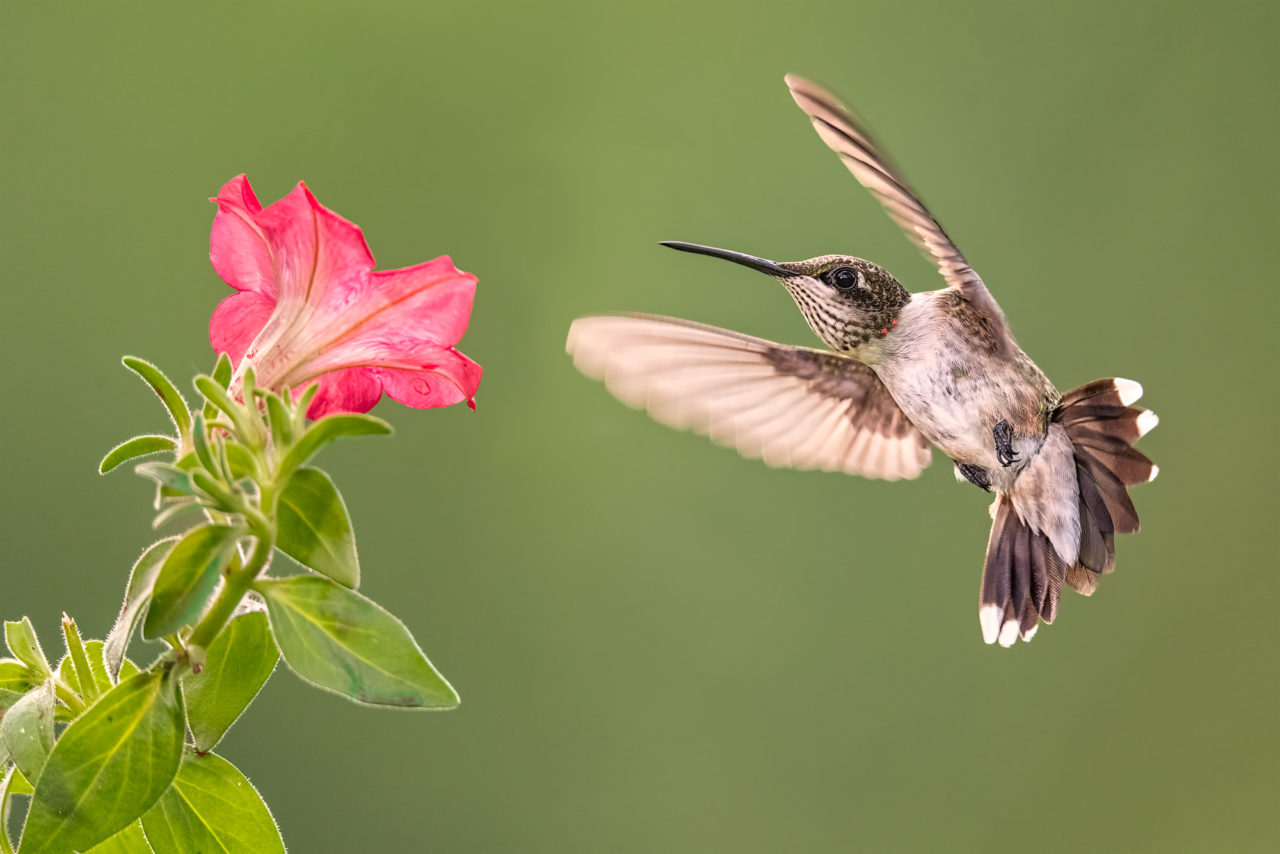
An additional consideration is that of esthetics; you may prefer your images to exhibit some wing blur to give a sense of motion. Using progressively lower shutter speeds will give more blur effect but also increase the risk of getting motion blur in the bird’s head and body. I certainly recommend experimenting with shutter speeds for desired effect. The shutter speeds used in my images varied between 1/2000 and 1/3000 second, and some wing blur is evident in all the images.
Aperture: The aperture setting determines your depth of field. You minimally want to have enough depth of field so that the bird’s head is in focus. On the other hand, if you want to maintain a soft out-of focus background, you must avoid apertures that bring the background into too much focus. I generally have a target aperture of about f8, but on overcast days I may compromise to avoid too high an ISO. I prefer f8 over f5.6 or f4.0 because the added depth of field will increase the likelihood that the bird’s head is satisfactorily sharp if my focus is slightly off.
ISO: Once you’ve decided upon a desired shutter speed and aperture to give your image the “look” you want (i.e. amount of wing blur and depth of field), select an appropriate ISO. You want to avoid a high ISO that will result in too much noise. With my Nikon D850, the highest ISO I feel comfortable using for any type of photography other than night photography is 3200. When ambient light levels are low you may have to compromise and accept a shutter speed or aperture a little lower than desired.
Focus Mode: I generally use auto-focus for ambient-light hummingbird flight images, as described in the section on focusing methods above. You can use manual focus and prefocus on the area just in front of the flower, but since depth of field is fairly shallow at f5.6 or 8, I think you will have better success with auto-focus. Hummingbirds often appear to hover in place, but they are also constantly shifting position.
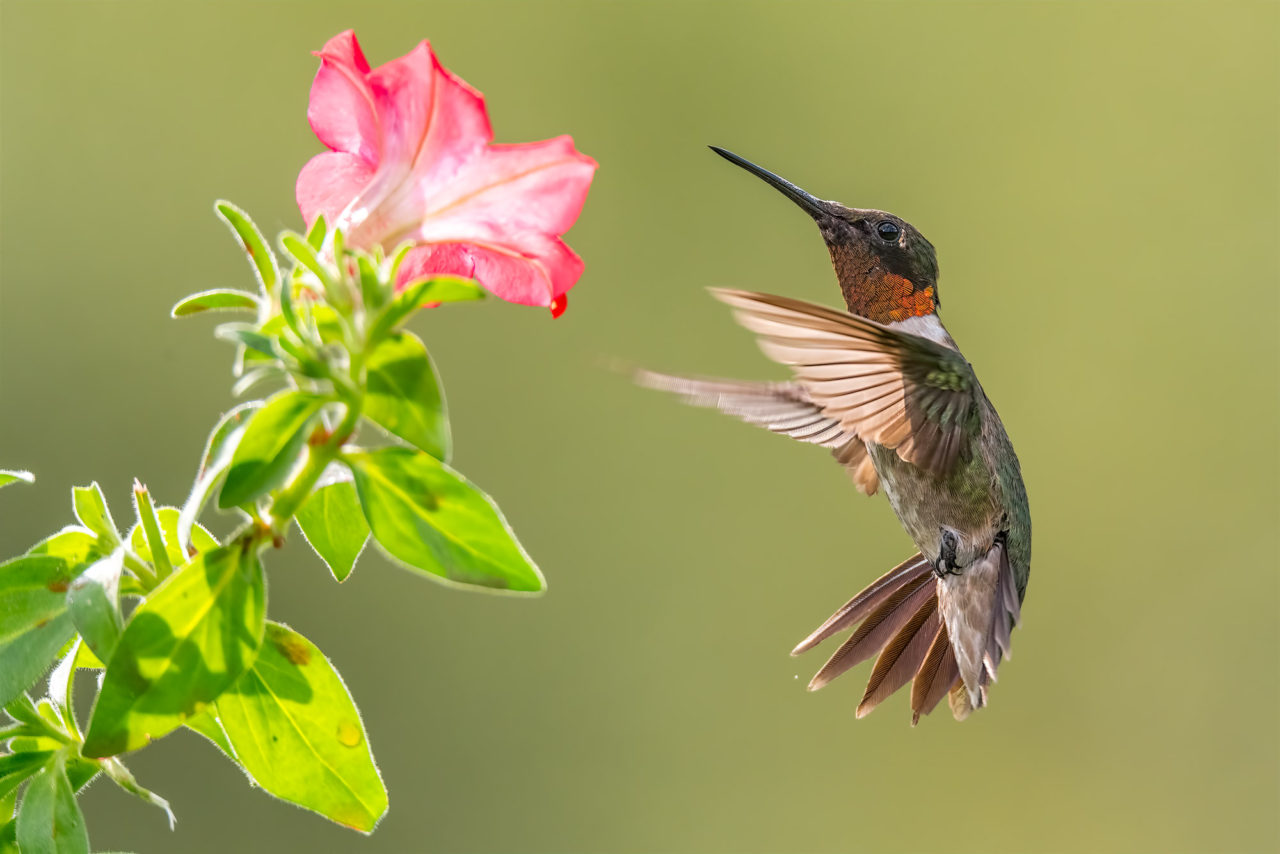
Flash: Although fill flash is not necessary for ambient light hummingbird photography, I prefer to use it whenever possible. Fill flash helps bring out the iridescent colors in the hummingbird plumage. It also adds another light source that increases the chances of lighting up the red gorget on the male ruby-throat. If the light doesn’t strike this area at the correct angle, then the gorget appears black rather than bright red.
With the high shutter speeds discussed above (1/2000s and higher), you can’t use flash as you typically do: at or below the camera’s flash sync speed (usually between 1/200-1/320 second). You need to use a camera and flash that is capable of High Speed Sync (HSS). Canon refers to this flash mode at “High-Speed Sync” while Nikon refers to it as “Auto FP High-Speed Sync”. HSS allows you to use your flash at the high shutter speeds needed to stop the action of a hummingbird in flight. HSS only works in TTL flash mode: you can’t use it in manual flash modes.
HSS works differently than using flash at the camera’s normal flash sync shutter speed. When the flash fires at a shutter speed at or below the flash sync speed, the burst of flash illuminates the entire sensor. This can happen because the shutter speed is slow enough that the neither the front nor rear shutter curtain is covering a part of the sensor. At higher shutter speeds, the rear shutter curtain has to begin to move across the sensor before the front shutter curtain has cleared it. At 1/8000s, the area of the sensor exposed at any one time is just a narrow slit between the front and rear shutter curtains. A single burst of flash under these conditions would illuminate only a narrow portion of the sensor.
When set to HSS, the flash fires a series of rapid flash pulses that illuminates each segment of exposed sensor as the shutter curtains move across the sensor, thus illuminating the entire sensor.
The biggest drawback to HSS is loss of light, and the higher the shutter speed the greater the loss of light. At 1/8000s, each segment of the exposed sensor is being illuminated by a smaller number of pulses. Just switching from standard TTL flash to HSS causes a loss of about one stop of light. And as you increase the shutter speed you lose more light, about one stop for each time you double the shutter speed.
Setting up HSS for your camera and flash is fairly simple, just follow the directions in your camera manual.
Positioning the Flash: I position my fill flash close to the subject, usually placing it above and slightly in front of the hummingbird, about 20 inches from the subject. I generally set the flash compensation at – 1 2/3, and adjust as needed after reviewing images. By placing the flash close to the subject, I know I have plenty of flash power for any shutter speed I choose to use. Also, the closer the flash is to the subject the larger the effective size of the light source (which will give relatively softer light).
Choosing to use the flash off-camera does complicate the set up somewhat. You have to maintain TTL and HSS flash communication with the camera. There are a lot of ways to use flashes off-camera, but many of them do not allow TTL and HSS capability. If you make any purchases in this regard, make sure theequipment will do what you need it to. I’m not familiar with all the ways to accomplish the necessary off-camera TTL/HSS flash communication (especially with non-Nikon cameras) but a few methods that work are:
- Use a radio trigger to communicate with the flash. Make sure it has TTL and HSS capability. The Photix Odin triggers are one example.
- With Nikon cameras you can use the camera’s pop-up flash in “commander mode” to control an off-camera flash in HSS.
- For Nikon cameras without a pop-up flash, you can use an SU-800 Wireless Speedlight Commander to control the off-camera flash.
- With Nikon cameras you can also use a second flash in the hotshoe in “commander” mode to control the off-camera flash.
If any readers know of other methods of using flashes off-camera in TTL and HSS mode, please let me know.
In my set up, I used two SB800 flashes with my Nikon D850, one in the hotshoe in commander mode and the other positioned close to the subject.
This concludes Part I of my article on Hummingbird Photography. Part II will cover the other two types of images mentioned earlier:
- Hummingbird in flight, exposed with flash only (multiple flashes used, no ambient light contributing to the exposure
- Hummingbird in flight–Blur/Sharp , combination ambient/flash exposure with flash exposure equal to ambient exposure.
I decided to make this a more detailed and comprehensive article than I initially planned, which is why it has been expanded to two parts. If you find it useful and would like to see more articles like this please let me know via the comments section. Any suggestions for improvement would also be appreciated.